
Introduction to Piercing Charts
Body piercing has become an integral part of personal expression, with a wide variety of styles and locations available. A piercing chart serves as an essential guide for anyone considering a new piercing, helping to understand the options, healing times, and aftercare required for different types of piercings. This comprehensive guide will delve into the specifics of each piercing type, providing detailed information to assist in making informed decisions.
Types of Piercings
Types Ear Piercings
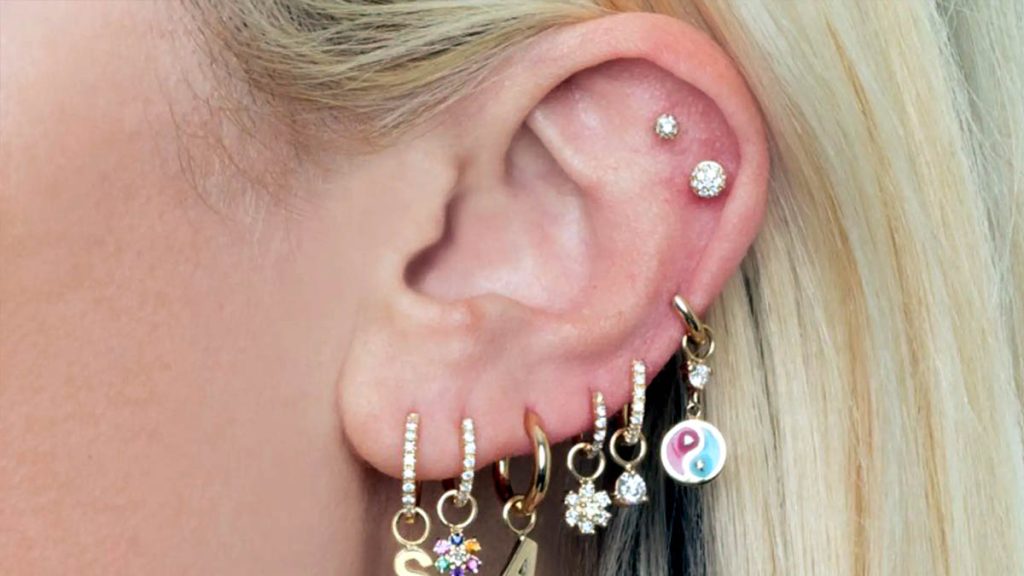
Ear piercings are among the most popular and diverse types, ranging from the classic lobe piercing to more intricate cartilage piercings. Here’s a detailed look at each:
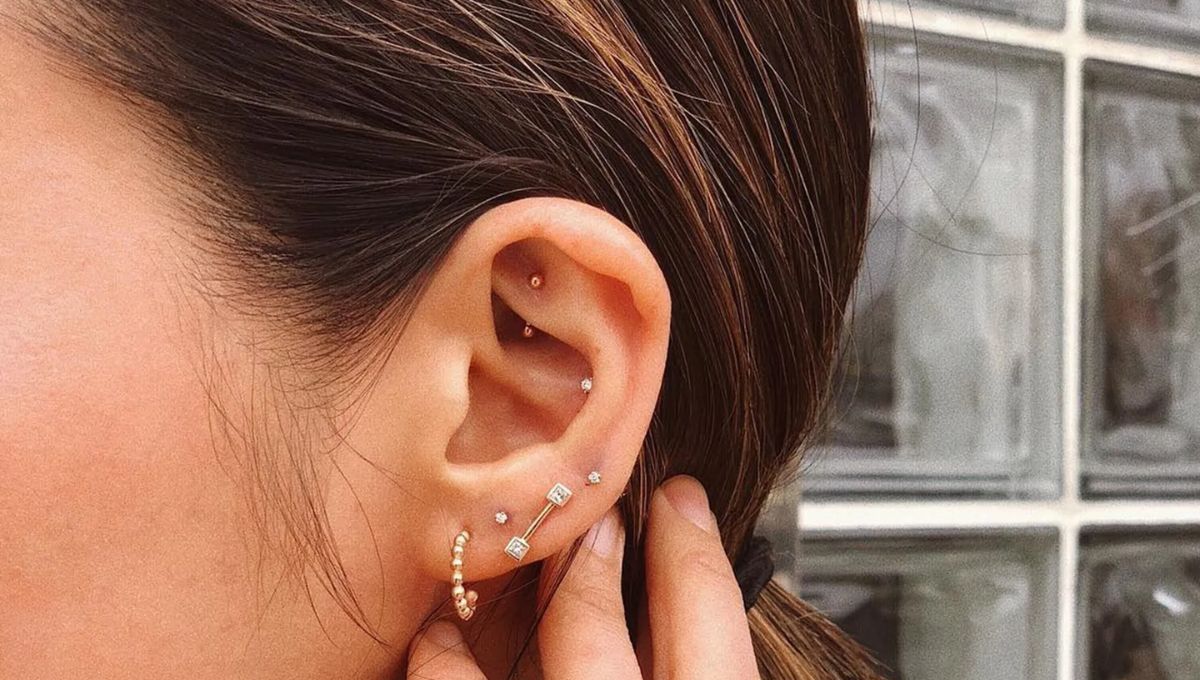
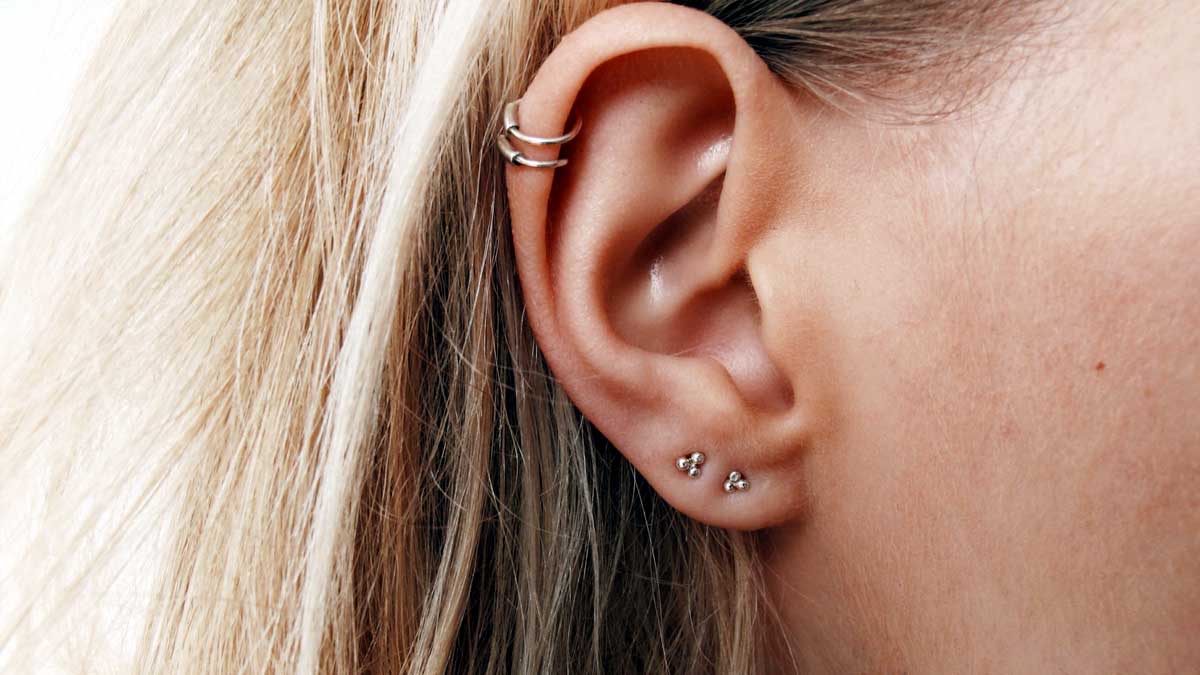
Lobe Piercing: This is the most common type of ear piercing, performed on the soft, fleshy lower part of the earlobe. It typically involves minimal pain and has a quick healing time of 6-8 weeks. Lobes can be pierced multiple times in various positions for a layered jewelry look.
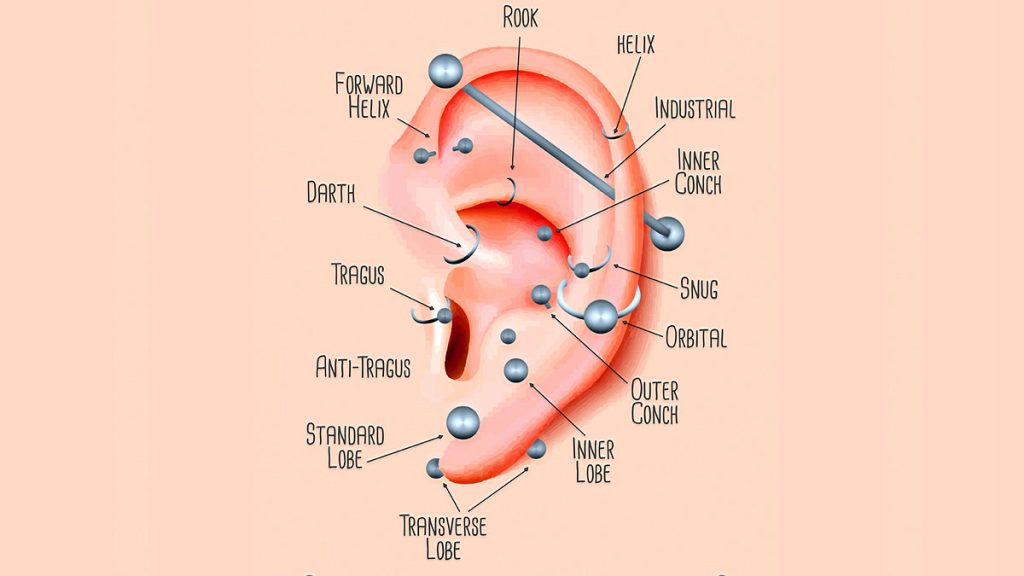
Helix Piercing: Located on the upper cartilage of the ear, this piercing can be single, double, or even triple. The helix piercing offers a subtle yet stylish appearance and has a healing time of 3-6 months. Due to the denser tissue, it can be more painful than lobe piercings.
Tragus Piercing: Positioned on the small, thick flap of cartilage that partially covers the ear canal, tragus piercings are trendy and unique. Healing takes around 4-8 months, and the piercing can be challenging due to the thickness of the cartilage.
Daith Piercing: This inner ear cartilage piercing is done through the fold of cartilage just above the ear canal. Some believe it can help alleviate migraines. Healing time is approximately 6-9 months.
Conch Piercing: The conch can be pierced in two places: the inner conch, which is closer to the ear canal, and the outer conch, which is located further out on the ear. Healing time ranges from 6-12 months, and the piercing offers a bold, eye-catching look.
Industrial Piercing: This involves two piercings connected by a single straight barbell, typically through the upper cartilage. It is a striking and dramatic piercing with a healing period of 6-12 months.
Types of Facial Piercings

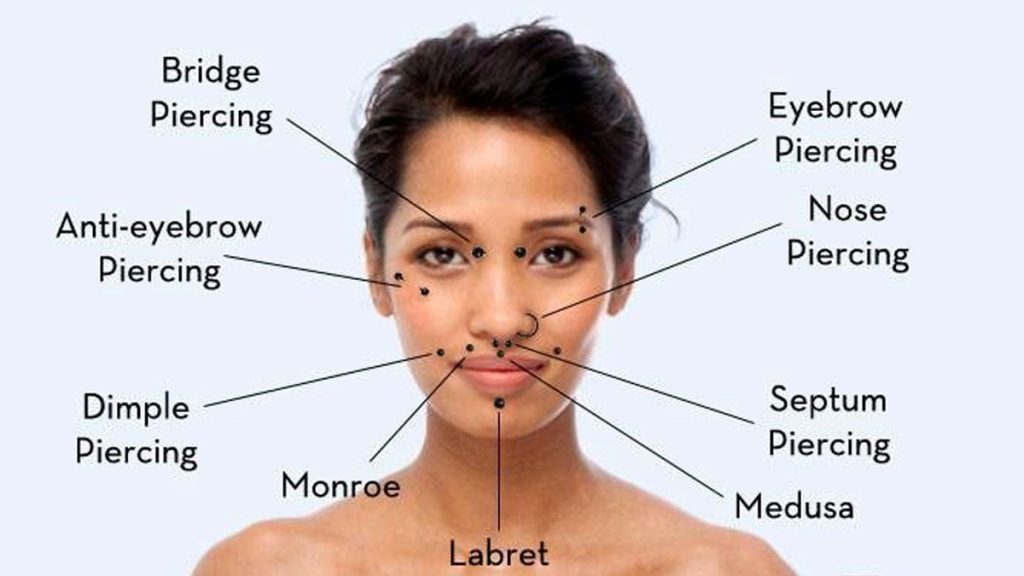
Facial piercings are a bold way to enhance one’s look, with several options each carrying unique charm and style. Here’s a closer look:
Eyebrow Piercing: Typically placed vertically through the eyebrow, eyebrow piercings are visually striking and heal within 6-8 weeks. They can be adorned with various jewelry styles like barbells and rings.
Nostril Piercing: A classic choice, nostril piercings are performed through the fleshier part of the nose. Healing takes 4-6 months. Nostril piercings can accommodate studs, rings, and various other jewelry styles.
Septum Piercing: This piercing is positioned through the soft cartilage in the middle of the nose, allowing for a wide range of jewelry such as rings and horseshoe barbells. Healing time is 6-8 months, and the piercing can be easily hidden with a retainer.
Bridge Piercing: Also known as Erl, this surface piercing is located on the bridge of the nose between the eyes. Healing time is 8-12 weeks. It creates a bold look but requires careful aftercare to prevent migration.
Lip Piercing: Lip piercings include various styles such as the Monroe (upper lip), Medusa (center upper lip), and Labret (below the bottom lip). Healing times vary from 6-8 weeks to several months. Lip piercings can be adorned with studs, rings, and labret jewelry.
Types of Body Piercings

Body piercings extend beyond the face and ears, offering even more ways to express individuality. Here’s an in-depth look:
Navel Piercing: Popular especially among women, navel piercings are typically placed just above the belly button. It may take six months to a year to heal. This piercing suits various jewelry styles, including curved barbells and captive bead rings.
Nipple Piercing: This piercing can be performed on all genders and is known for its aesthetic appeal and potential for increased sensitivity. It may take six months to a year to heal. Nipple piercings can be adorned with barbells, rings, and shields.
Dermal Piercing: Also known as microdermals, these piercings can be placed almost anywhere on the body. Healing typically takes 1-3 months. They involve an anchor placed beneath the skin and are decorated with a variety of tops.
Genital Piercing: Includes various types for both men and women, such as Prince Albert Piercing (through the urethra) or VCH (Vertical Clitoral Hood), with healing times varying greatly depending on the specific piercing. These piercings can enhance sexual pleasure and are often adorned with rings or barbells.
Healing Times and Aftercare
General Healing Guidelines
Understanding the healing process is crucial for maintaining the health of a new piercing. Factors such as the type of piercing, aftercare practices, and individual health can affect healing times. Here are the phases of healing:
Initial Healing Phase
During this phase, the piercing is most vulnerable to infection. It’s critical to maintain the region irritant-free and clean. Cleaning this piercing with a saline solution twice daily is recommended.
Secondary Healing Phase
Tissue begins to toughen and adapt around the jewelry. While the risk of infection decreases, care should still be taken to avoid irritation and bumps.
Complete Healing
Even after the initial and secondary phases, some piercings may take up to a year to be fully healed internally. Regular cleaning and careful monitoring are still necessary.
Aftercare Tips
Proper aftercare is essential for preventing infections and ensuring a smooth healing process:
Cleaning
Use a saline solution to clean the piercing site twice daily. Avoid using alcohol or peroxide, as they can be too harsh and delay healing.
Avoid Touching
Don’t use unclean hands to touch the piercing. Only handle it with clean hands when necessary to avoid introducing bacteria.
Jewelry Care
Ensure that the jewelry is made of hypoallergenic materials like titanium or surgical steel to prevent allergic reactions. Avoid changing the jewelry prematurely.
Keep an Eye Out for Infections
Keep an eye out for any symptoms, such as increased bleeding, swelling, soreness, or discharge. If these occur, increase your cleaning regimen and consult a healthcare professional if symptoms persist.
Pain tolerance varies greatly among individuals, but some piercings are generally known to be more painful than others. Here’s a detailed overview:
Least Painful
Earlobe, eyebrow and nose piercings are usually less painful due to the fleshier areas being pierced. They heal relatively quickly and involve minimal discomfort.
Moderate Pain
Cartilage piercings such as helix, tragus, and conch tend to be more painful because of the denser tissue. These areas also take longer to heal.
Most Painful
Nipple and genital piercings are often cited as the most painful, given the sensitivity of these areas. The pain can be intense, but it typically subsides quickly after the procedure.
Piercing Chart Pain: Understanding Pain Levels and Managing Discomfort
Introduction to Piercing Pain Levels
Getting a piercing can be an exciting way to express your individuality, but it’s important to understand the pain levels associated with different types of piercings. Pain is subjective and varies from person to person, but some piercings are generally known to be more painful than others. This guide will provide a comprehensive overview of piercing pain levels, helping you to make an informed decision and manage any discomfort effectively.
Pain Levels by Piercing Type
Ear Piercings Pain Level
Ear piercings are some of the most common and can range from low to moderate pain levels depending on the specific location on the ear.
- Lobe Piercing: The earlobe is fleshy and has fewer nerve endings, making it one of the least painful piercings. Pain Level: 2/10.
- Helix Piercing: Located on the upper cartilage, this piercing involves more pain due to the tougher tissue. Pain Level: 4/10.
- Tragus Piercing: The tragus is a small, thick piece of cartilage, which can be more painful to pierce. Pain Level: 5/10.
- Daith Piercing: This inner ear cartilage piercing can be more painful due to the dense cartilage and its location. Pain Level: 5/10.
- Conch Piercing: Piercing the inner or outer conch involves going through thicker cartilage, resulting in moderate pain. Pain Level: 6/10.
- Industrial Piercing: Combining two cartilage piercings connected by a barbell, this can be quite painful and involves a longer healing process. Pain Level: 7/10.
Facial Piercings Pain Level

Facial piercings can vary widely in pain levels depending on their placement and the thickness of the tissue.
- Eyebrow Piercing: This piercing goes through relatively soft tissue with moderate pain. Pain Level: 3/10.
- Nostril Piercing: Piercing the nostril can be more painful due to the thicker skin and cartilage. Pain Level: 4/10.
- Septum Piercing: This piercing passes through the thin, soft tissue below the cartilage, which can be painful but usually not unbearable. Pain Level: 6/10.
- Bridge Piercing: Piercing the skin on the bridge of the nose involves surface tissue, with moderate pain and healing considerations. Pain Level: 5/10.
- Lip Piercing: Includes various styles such as the Monroe, Medusa, and Labret, which can range from low to moderate pain depending on location. Pain Level: 4-6/10.
Body Piercings Pain Level

Body piercings often involve thicker tissue or sensitive areas, resulting in higher pain levels.
- Navel Piercing: Piercing the skin around the belly button involves moderate pain, especially for those with less flesh in this area. Pain Level: 4/10.
- Nipple Piercing: Known for its higher pain due to the sensitivity of the area, nipple piercings can be quite intense. Pain Level: 7/10.
- Dermal Piercing: Involves inserting an anchor beneath the skin, which can be painful depending on the placement. Pain Level: 5/10.
- Genital Piercing: These piercings are often the most painful due to the high concentration of nerve endings in the area. Pain Level: 8-10/10.
Managing Piercing Pain
Understanding the pain levels associated with different piercings can help you prepare mentally and physically. Here are some tips for managing piercing pain:
Before the Piercing
- Research: Understand the process and pain level of your desired piercing. Anxiety can be lessened by being prepared.
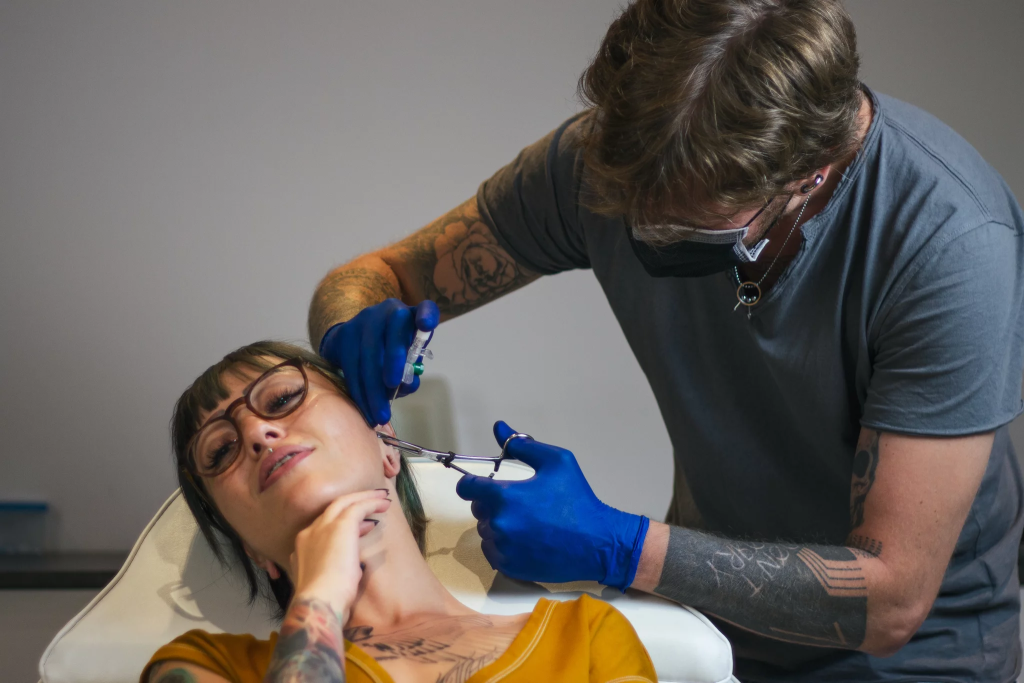
- Choose a Reputable Piercer: A skilled and experienced piercer can minimize pain through proper technique and sterile practices.
- Hydrate and Eat Well: Ensure you are well-hydrated and have eaten a balanced meal before your appointment to prevent dizziness or fainting.
During the Piercing
- Stay Calm: Deep breathing and relaxation techniques can help manage pain and keep you calm during the procedure.
- Focus on Your Breathing: Taking slow, deep breaths can help reduce pain perception and keep you relaxed.
- Listen to Music or Use Distractions: Bringing headphones and listening to music can provide a distraction and make the experience more comfortable.
After the Piercing
- Follow Aftercare Instructions: Proper aftercare is crucial to minimize pain and prevent complications. Follow your piercer’s instructions for cleaning the piercing.
- Use Over-the-Counter Pain Relievers: Non-prescription pain relievers like ibuprofen can help manage post-piercing pain and reduce inflammation.
- Apply a Cold Compress: Using a cold compress can help reduce swelling and numb the area, alleviating pain.
- Avoid Irritants: Refrain from touching the piercing with dirty hands, and avoid tight clothing or accessories that may irritate the area.
Pain is an inevitable part of the piercing process, but understanding the pain levels associated with different types of piercings can help you make an informed decision and prepare accordingly. By choosing a reputable piercer, following proper aftercare instructions, and using pain management techniques, you can ensure a smoother and more comfortable piercing experience.
Choosing the Right Piercing Studio
Selecting a reputable piercing studio is vital for a safe and successful piercing experience. Here are some things to think about when you decide:
Professional Certification
Ensure the studio employs certified piercers who follow proper hygiene protocols. Seek certificates from associations of professionals that are well-known.
Sterilization Practices
The studio should use sterilized equipment and single-use needles. Autoclave sterilization is a must for all tools and jewelry.
Portfolio and Reviews
Examine the studio’s portfolio to see examples of their work. Examine testimonials to determine past customers’ experiences.
Consultation
A good piercer will offer a thorough consultation to discuss your options, the process, and aftercare. They ought to reassure you and respond to all of your inquiries.
Common Piercing Problems and Solutions
Even with the best care, some issues can arise. Here are common problems and their solutions:
Infection
Signs of infection include excessive redness, swelling, pain, and discharge. If you notice these symptoms, increase your cleaning regimen and consult a healthcare professional if they persist.
Jewelry Rejection
This occurs when the body pushes out the jewelry. It can be caused by improper placement, inappropriate jewelry, or individual body reaction. If you notice the piercing migrating, see your piercer for advice. They may recommend switching to a different type of jewelry or retiring the piercing.
Keloids
These are raised scars that can develop around the piercing. They can be managed with over-the-counter treatments or by consulting a dermatologist. Avoid irritating the piercing to prevent keloid formation.
Final Thoughts
Piercings are a great way to show off your unique style and originality. By understanding the different types of piercings, their healing processes, and how to care for them properly, you can enjoy your piercings for years to come. Whether you’re new to the world of body modification or a seasoned enthusiast, this comprehensive guide to piercing charts should help you make informed decisions and care for your piercings effectively.