
Lip piercings have become a captivating fashion statement, allowing individuals to express their unique style. This comprehensive guide explores various lip piercing styles, placement considerations, jewelry options, pain levels, healing times, aftercare routines, and how to choose a professional piercer.
Lip Piercings Chart
We will Discus in Lip Piercings Chart the types of lips Piercings, pain level, healing time and after care
Types of Lip Piercings
Lip piercings come in a plethora of styles, each offering a distinct aesthetic. Here are some of the most popular piercing types:
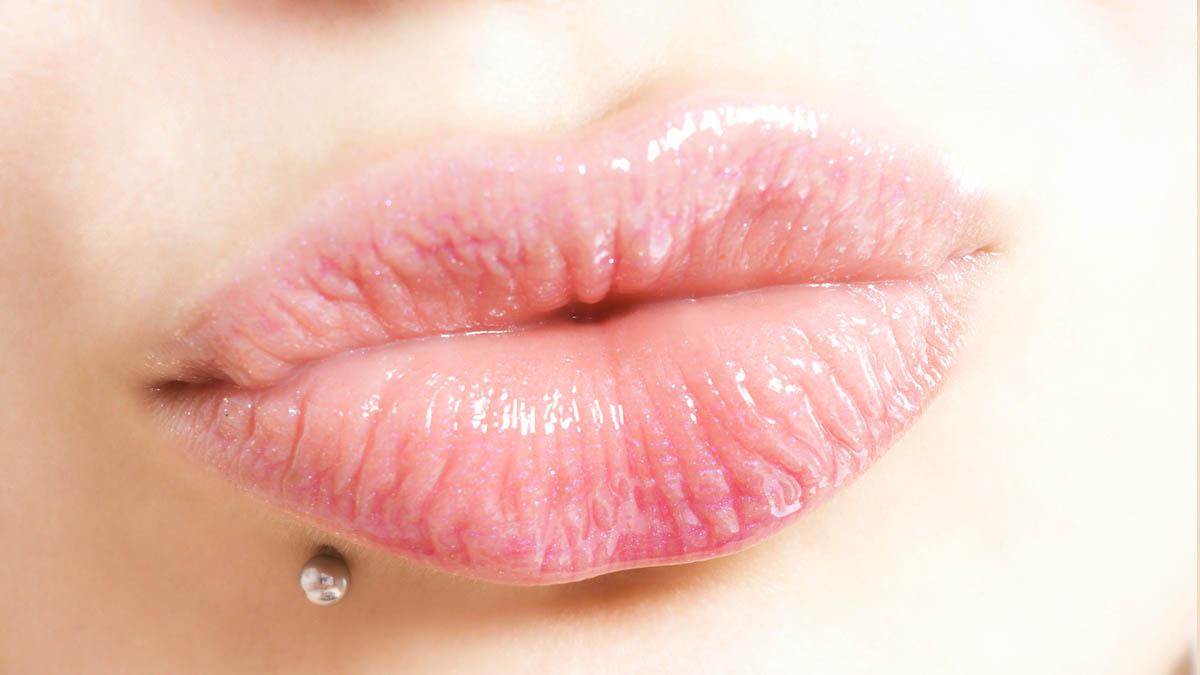
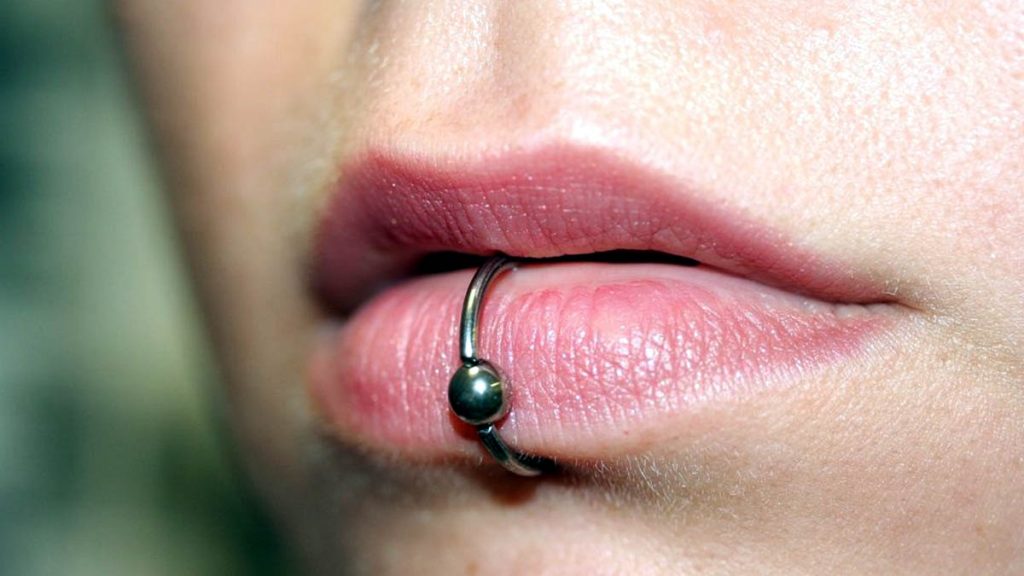
Labret Piercing
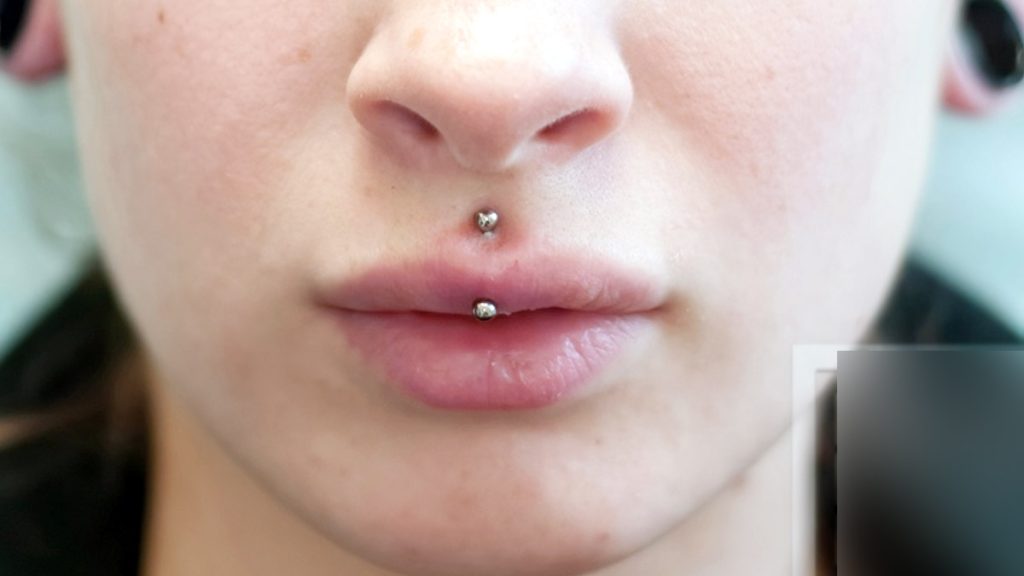
The labret piercing is a classic choice, positioned centrally just below the lower lip. This piercing is versatile, allowing for various jewelry options such as studs or rings. The term “labret” refers specifically to the type of jewelry used, which typically features a flat backplate and a decorative front.
Monroe Piercing
Inspired by Marilyn Monroe’s iconic beauty mark, the Monroe piercing is placed off-center above the upper lip on the left side. This piercing adds a touch of classic Hollywood glamour to your look. The jewelry used is often a small, subtle stud.
Madonna Piercing

The Madonna piercing mirrors the Monroe but is located on the right side of the upper lip. It offers a balanced, symmetrical aesthetic for those who prefer this over the traditional left-sided Monroe.
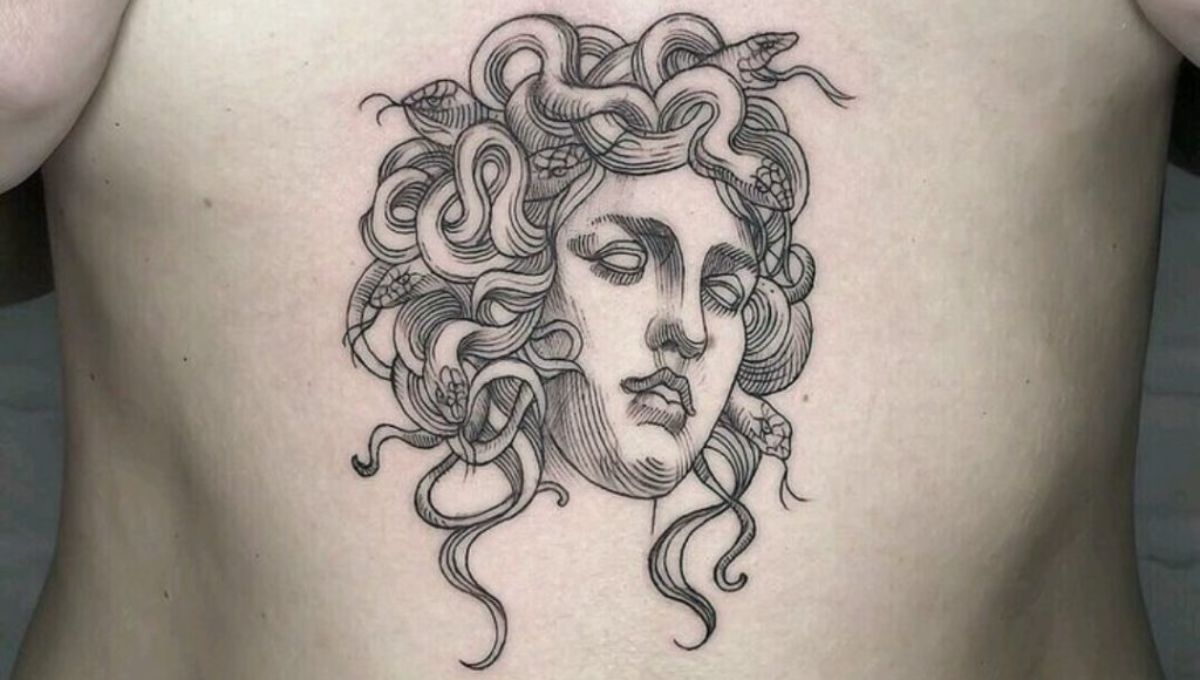
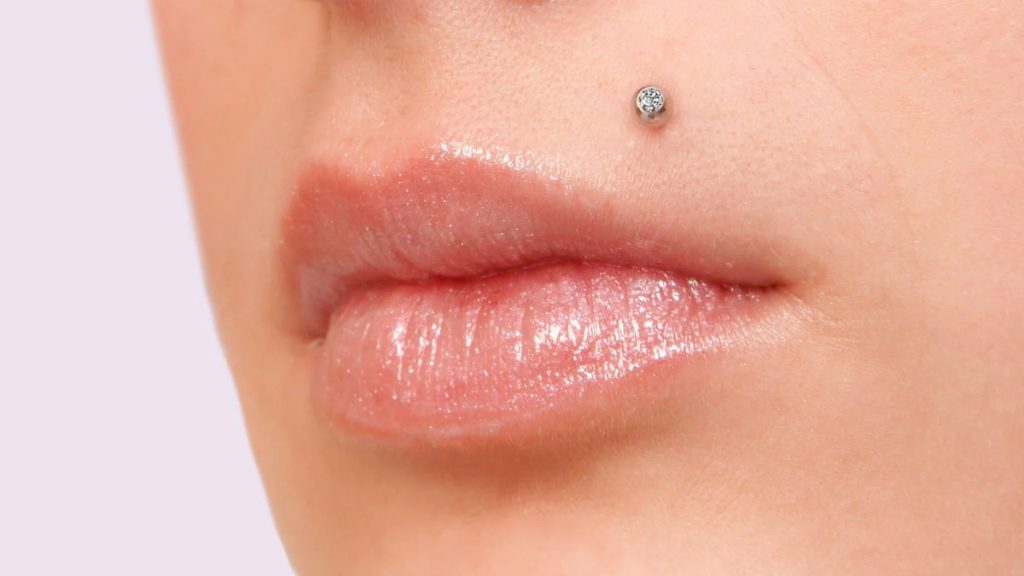
Medusa Piercing
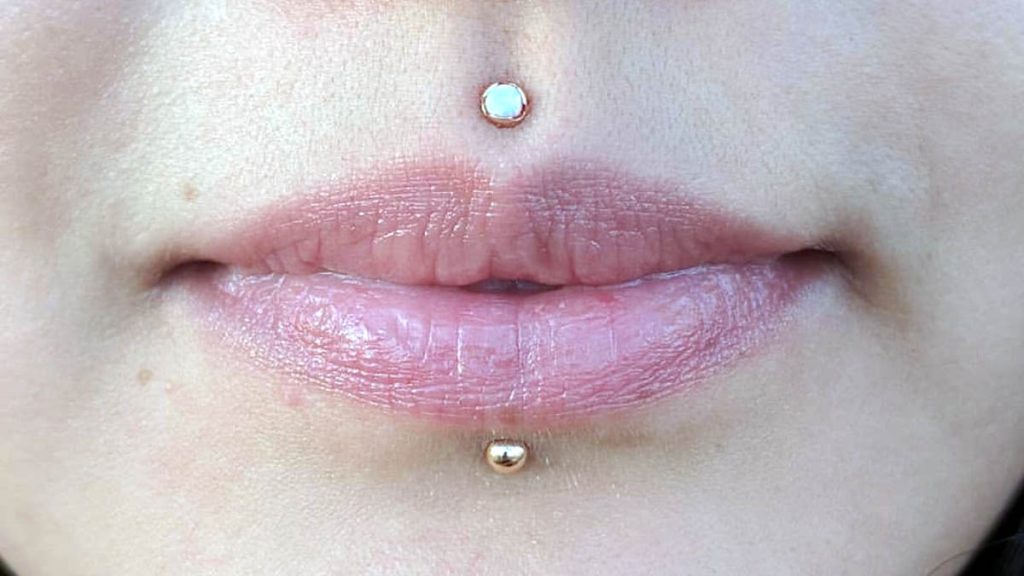
The Medusa piercing, also known as the philtrum piercing, is located in the indentation above the upper lip and below the nose. This piercing draws attention to the upper lip and can be a striking focal point, often complemented by a labret piercing for a balanced look.
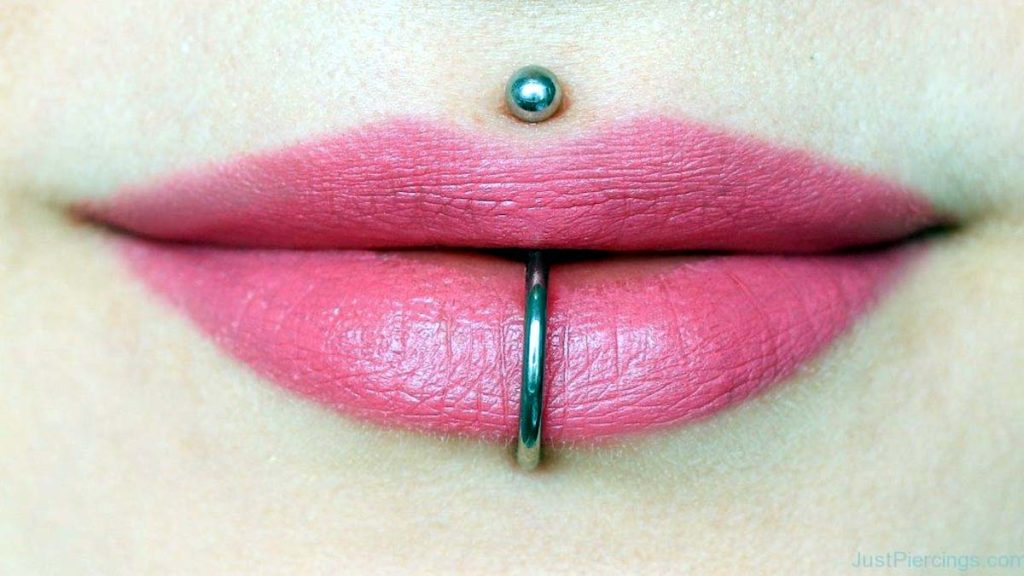
Vertical Labret Piercing
The vertical labret piercing is unique in that it passes vertically through the lower lip, with both ends of the jewelry visible. This piercing creates a distinctive, eye-catching look and is typically adorned with a curved barbell.
Jestrum Piercing
A variation of the Medusa, the Jestrum piercing goes through the upper lip in a similar manner to the vertical labret, allowing both ends of the jewelry to be visible. This piercing is ideal for those who want a more pronounced look on the upper lip.
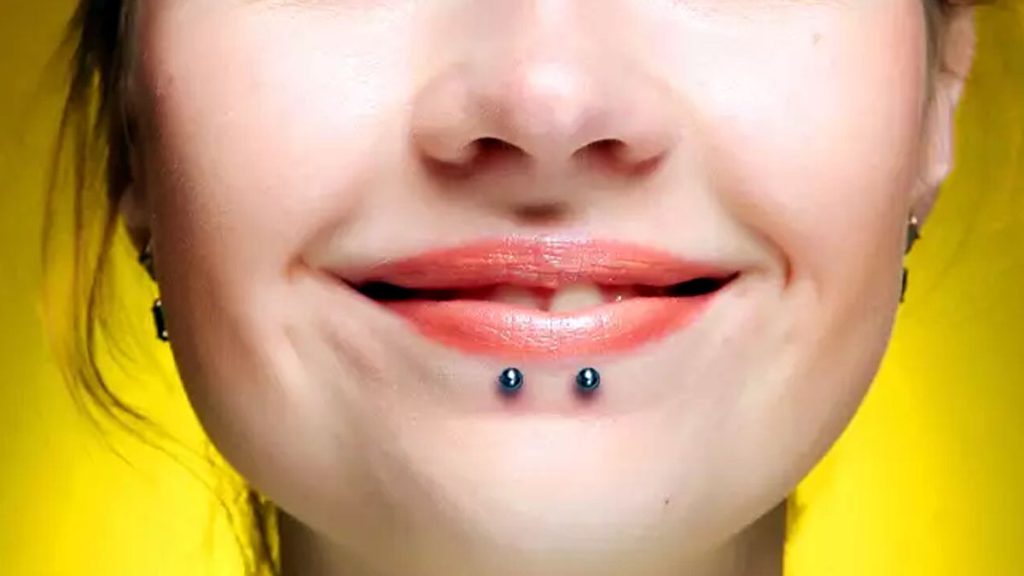
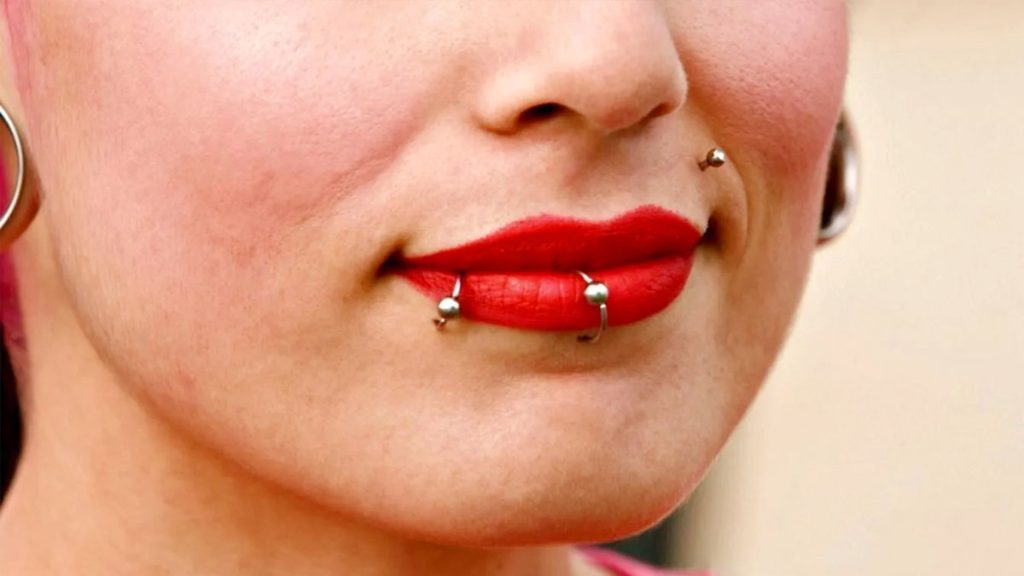
Snake Bites Piercing
Snake bites consist of two piercings placed symmetrically on either side of the lower lip, resembling snake fangs. This snake bites style is popular among those looking for a bold and edgy appearance.
Spider Bites Piercing
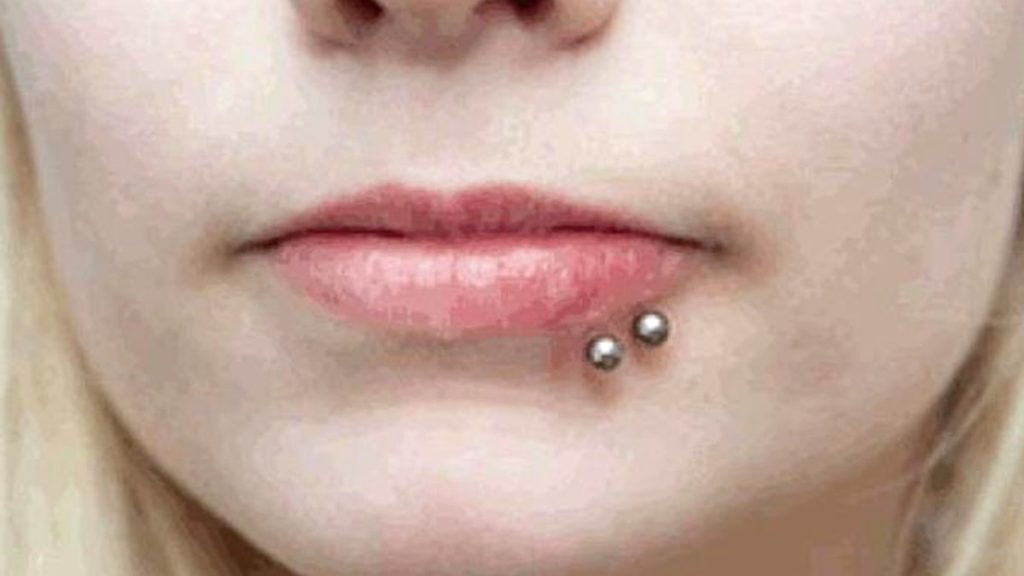
Similar to snake bites, spider bites are two piercings placed closely together on one side of the lower lip. This style offers a concentrated, intense look.
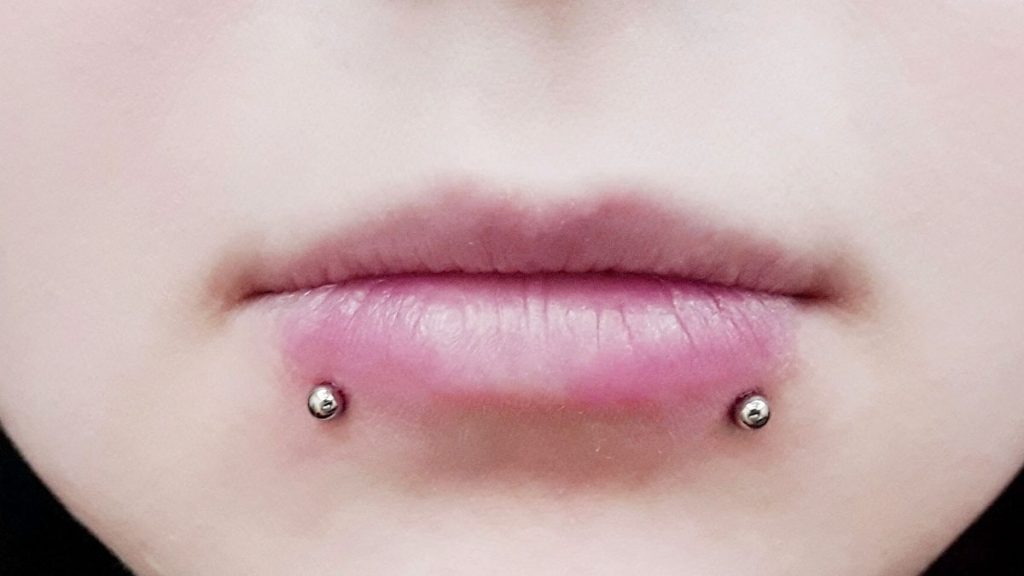
Dolphin Bites Piercing
Dolphin bites are similar to snake bites but are positioned closer together beneath the lower lip. They provide a subtler variation on the snake bites style.
Cyber Bites Piercing

Cyber bites combine a Medusa piercing with a labret piercing, creating a vertical alignment from the upper to lower lip. This combination is ideal for those looking to make a striking statement.
Lip Piercing Placement and Jewelry
Selecting the right placement and jewelry is essential for both aesthetic appeal and comfort.
Placement Considerations
- Facial Anatomy: The structure of your lips and surrounding tissue can significantly influence the best placement for your piercing. A professional piercer can assess your anatomy to recommend the most suitable position.
- Personal Style: Your personal style and preference for symmetry or asymmetry will guide your placement choice. Consider how the piercing will complement your overall look.
- Lifestyle Factors: Consider your daily activities, such as work or sports. Certain placements might interfere more with specific activities, and it’s essential to choose a placement that fits your lifestyle comfortably.
Jewelry Options
- Labret Studs: These are the most common jewelry type for lip piercings, featuring a flat disc on one end and a decorative piece on the other. Labret studs are versatile and can be easily customized with different ends.
- Captive Bead Rings (CBRs): Rings with a small bead that closes the loop, providing flexibility and a wide variety of styles. They are popular for their classic and elegant look.
- Circular Barbells: Horseshoe-shaped jewelry that can be adorned with beads or spikes for a unique and edgy appearance. They offer a dynamic look that can be customized to fit different styles.
Lip Piercing Pain Chart: Understanding the Pain Levels
Understanding the pain levels associated with different lip piercings can help you make an informed decision and prepare for your piercing experience. This guide provides a detailed pain chart for various lip piercings, explaining what to expect during the procedure and the healing process.
Factors Affecting Pain Levels
Several factors can influence how much pain you might experience with a lip piercing:
Individual Pain Tolerance: Everyone’s pain threshold is different. What might be mildly uncomfortable for one person could be quite painful for another.
Piercing Location: Some areas of the lip have more nerve endings than others, which can affect pain levels.
Piercing Technique: The skill and technique of the piercer can also impact how much pain is felt.
Aftercare Practices: Proper aftercare can minimize pain and discomfort during the healing process.
Pain Chart for Lip Piercings
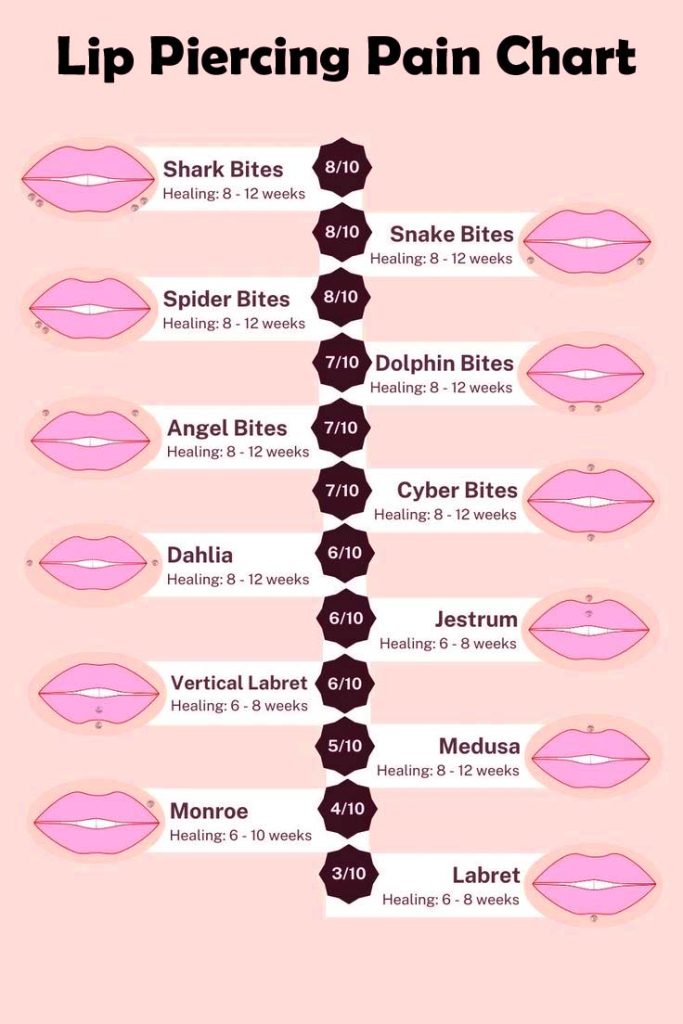
Here’s a breakdown of the pain levels for various types of lip piercings:
Labret Piercing
Pain Level: 3/10
The labret piercing is placed centrally just below the lower lip. Because it passes through a relatively thin area of tissue, it is generally considered to be one of the less painful lip piercings. Most people describe the sensation as a quick, sharp pinch followed by minor soreness.
Monroe Piercing
Pain Level: 4/10
The Monroe piercing, located above the upper lip on the left side, passes through slightly thicker tissue compared to the labret. The pain is often described as a sharp pinch with some pressure. The initial piercing is quick, and any lingering discomfort typically subsides within a few days.
Madonna Piercing
Pain Level: 4/10
The Madonna piercing mirrors the Monroe but is positioned on the right side of the upper lip. The pain level is similar to that of the Monroe piercing, involving a sharp pinch and brief pressure. Most people find the pain manageable and short-lived.
Medusa Piercing
Pain Level: 5/10
The Medusa piercing, located in the philtrum (the groove between the base of the nose and the upper lip), involves passing through slightly thicker tissue and can be moderately painful. The sensation is often described as a sharp, intense pinch followed by throbbing. Although normal, swelling usually goes away in a few days.
Vertical Labret Piercing
Pain Level: 6/10
The vertical labret piercing passes vertically through the lower lip, with both ends of the jewelry visible. This piercing can be more painful due to the increased amount of tissue involved. Expect a sharp pinch and significant pressure during the procedure, followed by swelling and tenderness during the initial healing phase.
Jestrum Piercing
Pain Level: 6/10
The Jestrum piercing is similar to the vertical labret but is positioned in the upper lip. The pain level is comparable to the vertical labret, involving a sharp pinch and pressure. Swelling and tenderness are common, and it may take longer to heal fully.
Snake Bites
Pain Level: 5-7/10
Snake bites consist of two piercings placed symmetrically on either side of the lower lip. The pain level can vary depending on individual tolerance, but it generally involves two sharp pinches. Swelling and soreness are common due to the double piercing, and aftercare is crucial to manage discomfort.
Spider Bites
Pain Level: 5-7/10
Similar to snake bites, spider bites are two piercings placed closely together on one side of the lower lip. The pain level is similar, involving two sharp pinches and significant pressure. Swelling and tenderness are common, with careful aftercare needed to minimize discomfort.
Dolphin Bites
Pain Level: 5-7/10
Dolphin bites are two piercings placed closely together beneath the lower lip. The pain level can be comparable to snake or spider bites, involving two sharp pinches. Swelling and soreness are expected, with proper aftercare essential to manage the healing process.
Cyber Bites
Pain Level: 6/10
Cyber bites combine a Medusa piercing with a labret piercing, creating a vertical alignment from the upper to lower lip. The pain level is higher due to the dual piercings, involving two sharp pinches and significant pressure. Swelling and tenderness are common, and diligent aftercare is crucial for healing.
Lip Piercing After Care and Healing Time
While some discomfort is inevitable with any piercing, there are several ways to manage pain and ensure a smoother healing process:
Before the Piercing
- Hydrate Well: Drink plenty of water to keep your body hydrated and tissues supple.
- Eat a Healthy Meal: Ensure you have a nutritious meal before your appointment to maintain your energy levels.
- Avoid Alcohol and Caffeine: These can thin your blood and increase bleeding.
During the Piercing
- Stay Calm and Relaxed: Take deep breaths to stay calm and reduce tension.
- Trust Your Piercer: A professional piercer will ensure a quick and smooth process, minimizing pain.
After the Piercing
- Cold Compresses: Apply cold compresses to reduce swelling and numb the area.
- Over-the-Counter Pain Relief: Use pain relievers like ibuprofen to manage pain and reduce inflammation.
- Follow Aftercare Instructions: Adhere to the cleaning and care guidelines provided by your piercer to prevent infections and promote healing.
Understanding the pain levels associated with different lip piercings can help you prepare mentally and physically for the procedure. By choosing a professional piercer and following proper aftercare, you can minimize discomfort and enjoy your new piercing. Always consult with your piercer about any concerns or questions you may have to ensure a safe and successful piercing experience.
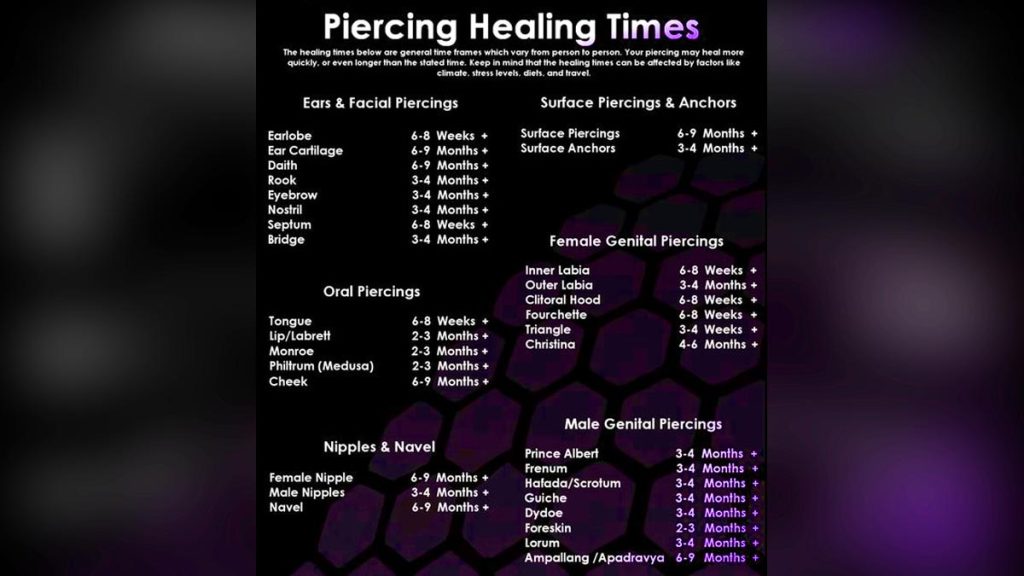
Healing Times
- Initial Healing: Most lip piercings take 6-8 weeks for the initial healing process. During this time, it’s crucial to follow aftercare instructions closely to prevent infections and complications.
- Complete Healing: Full healing can take up to 6 months, depending on care and individual healing processes. Some people may experience longer healing times if their bodies take longer to adjust or if they do not follow proper aftercare routines.
Aftercare for Lip Piercings
Infections can be avoided and a seamless healing process can be ensured with proper treatment.
Cleaning Routine
- Saline Solution: Clean the piercing with a saline solution twice daily. You can make this at home by mixing 1/4 teaspoon of non-iodized sea salt in a cup of warm distilled water. This solution helps to gently cleanse the piercing and promote healing without causing irritation.
- Avoid Alcohol-Based Cleaners: These can dry out and irritate the piercing. Instead, use saline solutions or specially formulated piercing aftercare products recommended by your piercer.
- Oral Hygiene: Maintain excellent oral hygiene by brushing your teeth twice daily and using an alcohol-free mouthwash after meals. This helps to keep the area around the piercing clean and free of bacteria that can cause infections.
Things to Avoid
- Touching and Twisting: Avoid touching or twisting the jewelry, as this can introduce bacteria and delay healing. If you must touch your piercing, make sure your hands are thoroughly washed.
- Smoking and Alcohol: These can irritate the piercing and prolong the healing process. If you smoke, try to minimize it or quit during the healing period. Avoid alcohol consumption, especially spirits, as they can cause irritation.
- Spicy and Acidic Foods: These can cause pain and irritation. Opt for milder foods and drinks during the initial healing period to avoid unnecessary pain and swelling.
Potential Complications
Being aware of potential complications can help you take timely action if needed.
Infection
- Signs: Increased redness, swelling, pain, and discharge are common signs of infection. If you have these symptoms, you should act right away.
- Action: Consult a professional piercer or healthcare provider if you suspect an infection. They may recommend an appropriate course of treatment, which could include antibiotics or special cleaning routines.
Jewelry Rejection
- Signs: Jewelry rejection occurs when the body perceives the jewelry as a foreign object and tries to push it out. Signs include the jewelry moving closer to the surface of the skin, persistent soreness, and thinning skin around the piercing.
- Action: Visit a piercer to discuss jewelry options or potential removal. They can suggest different types of jewelry that are less likely to be rejected, such as titanium or biocompatible materials.
Swelling and Bruising
- Management: Use cold compresses and anti-inflammatory medication as advised by your piercer. Swelling and bruising are common during the initial healing phase and can usually be managed with proper aftercare.
Choosing a Professional Piercer
Selecting a reputable and professional piercer is crucial for a safe and successful piercing experience.
What to Look For
- Experience and Credentials: Ensure the piercer has ample experience and is certified by relevant piercing associations. An experienced piercer will have the skills and knowledge to perform the procedure safely and correctly.
- Cleanliness: The piercing studio should adhere to stringent hygiene standards. Look for a clean and organized workspace, with sterilized equipment and single-use needles.
- Client Reviews: Check reviews and testimonials to gauge previous clients’ satisfaction. Positive feedback and a good reputation are indicators of a reliable and professional piercer.
Questions to Ask
- Sterilization Procedures: Inquire about their sterilization processes for tools and jewelry. A professional piercer should be able to explain their methods for ensuring a sterile environment.
- Aftercare Guidance: Ask for detailed aftercare instructions and what to do in case of complications. A good piercer will provide comprehensive aftercare information and be available for follow-up questions or concerns.
Final Wording
Lip piercings offer a diverse range of styles and placements, each with its own unique charm. By understanding the different types, proper placement, pain expectations, and aftercare routines, you can enjoy a stylish and safe piercing experience. Always choose a professional piercer and adhere to aftercare guidelines to ensure your piercing heals well and looks fantastic.