
Are you the one who’s been looking for some refreshing nail designs? Ombre nail designs are the perfect way to achieve stunning gradient nails that are sure to turn heads. Whether you’re a nail art enthusiast or just starting out, this article is filled with tips and tricks to help you master the art of Ombre.
From choosing the right colors to achieving a flawless blend, we’ve got you covered. Get ready to express your personal style and create eye-catching nail designs that are guaranteed to impress. Let’s dive into the world of Ombre nail designs and take your nail art game to the next level!
What is An Ombre Nail Design?
Ombre nail design is a technique where two or more colors are blended together to create a gradient effect on the nails. The word “Ombre” comes from the French word meaning “shaded” or “graduated.” This technique can be achieved using different colors, shades, and even textures to create a unique and eye-catching look.
Types of Ombre Nail Design
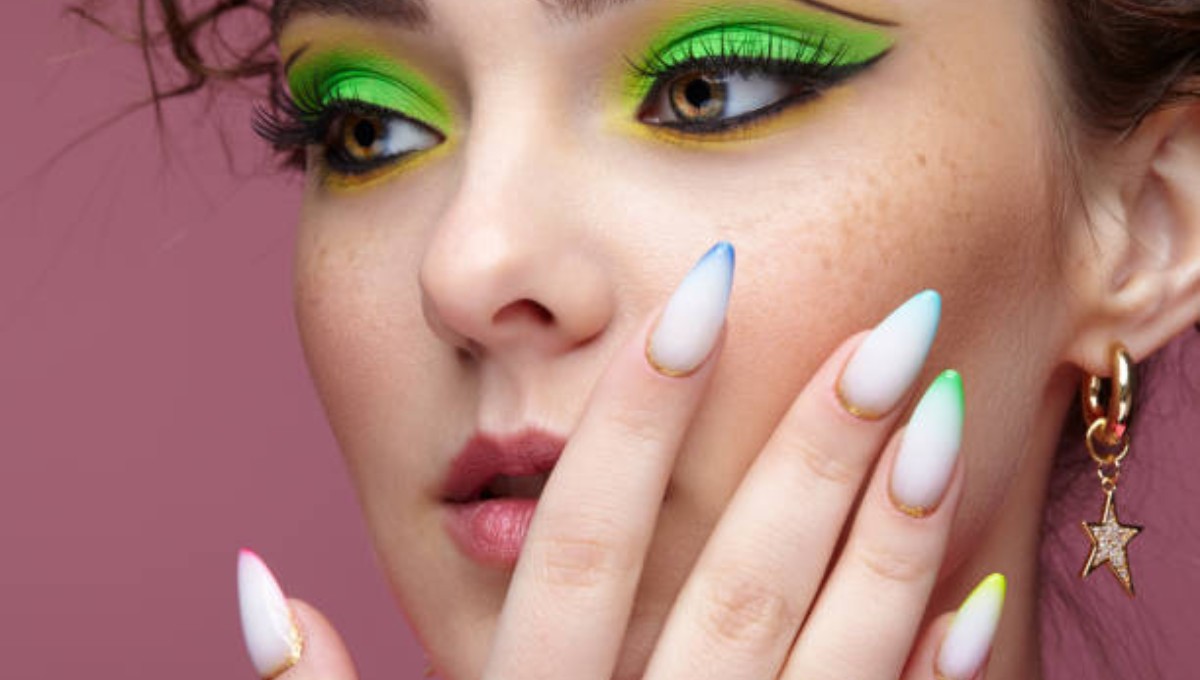
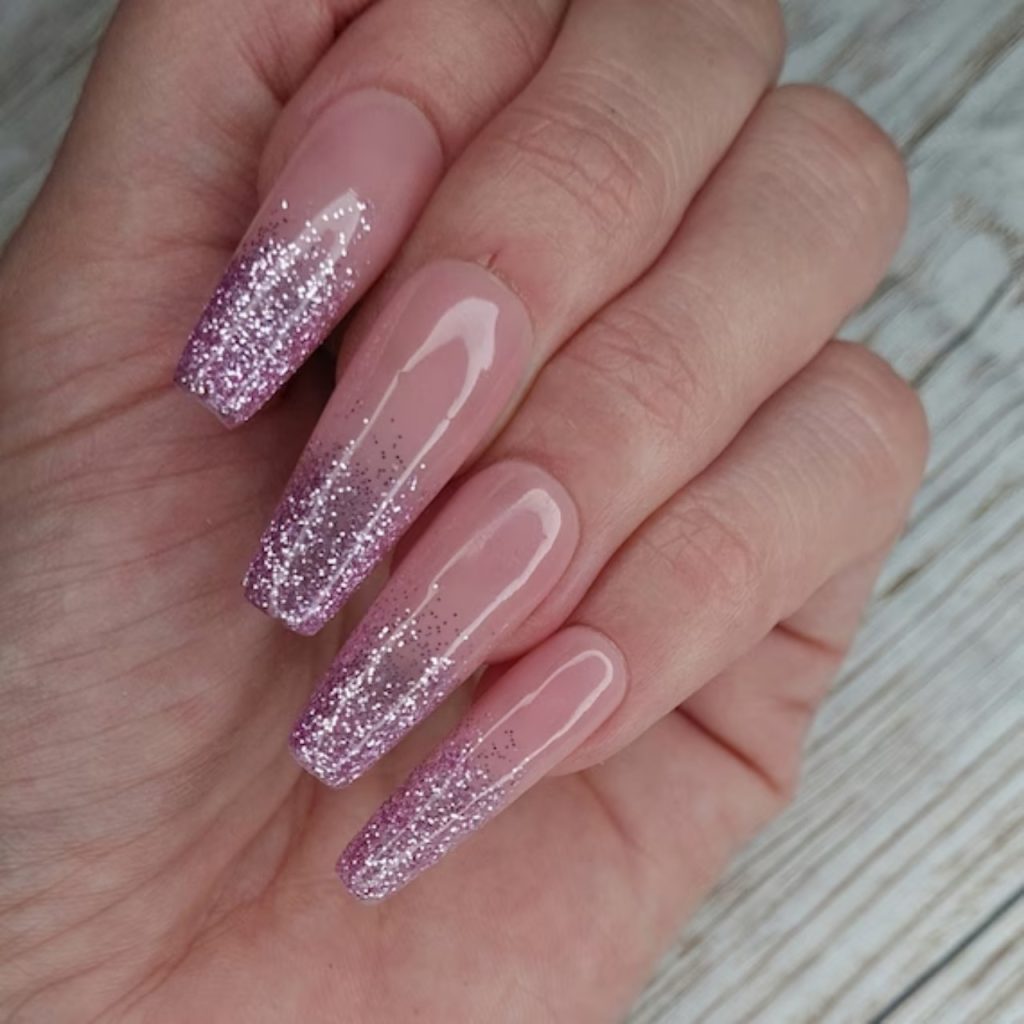
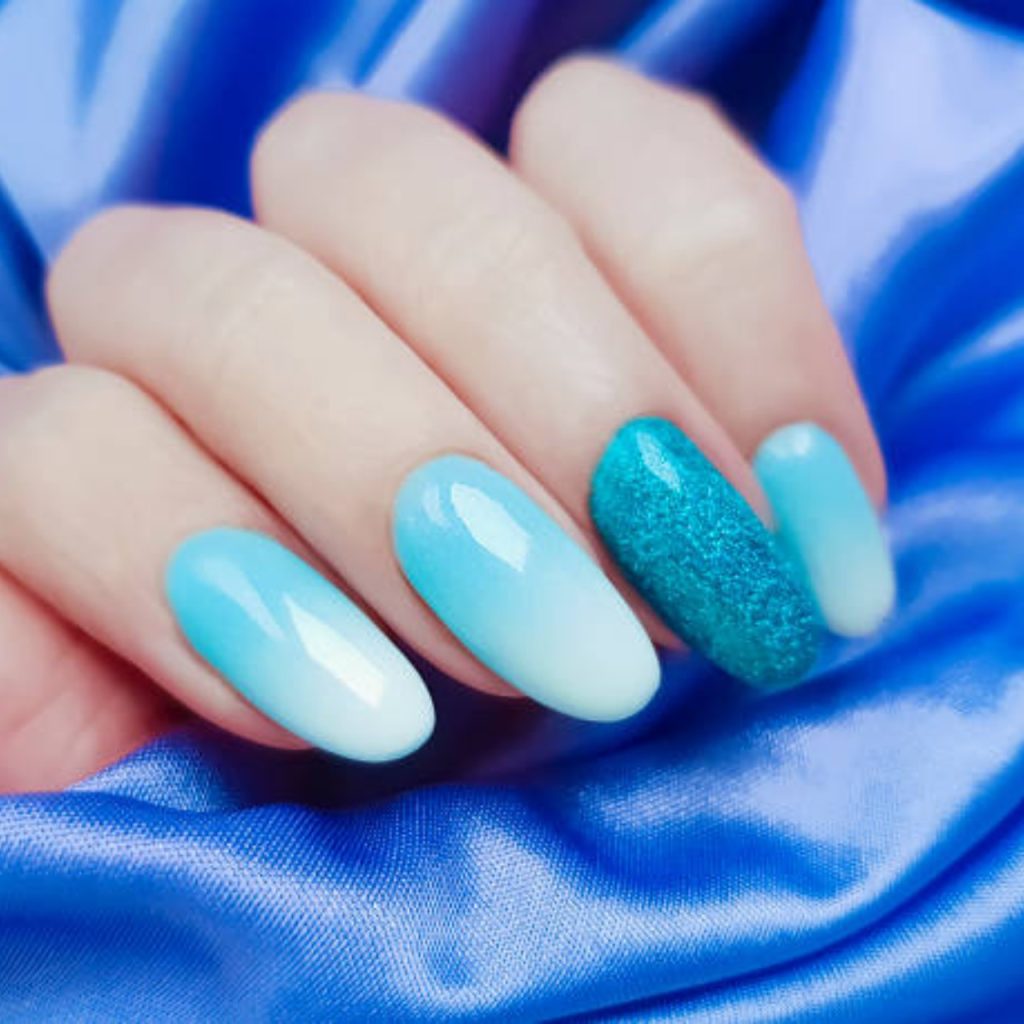
Glitter Ombre Nails: Glitter Ombre nail designs add a touch of sparkle and glamour to your manicure. This type of Ombre design incorporates glitter, shimmer, or metallic elements into the gradient effect. Whether you choose a subtle shimmer or go all-out with dazzling sparkles, glitter Ombre nails catch the light and make a statement.
Ombre French Nails: Ombre French nails combine the classic French manicure with the gradient effect of Ombre. In this design, the traditional white tip of a French manicure transitions into a subtle or bold gradient, creating a modern twist on a timeless style. Ombre French nails add sophistication and uniqueness to your manicure.
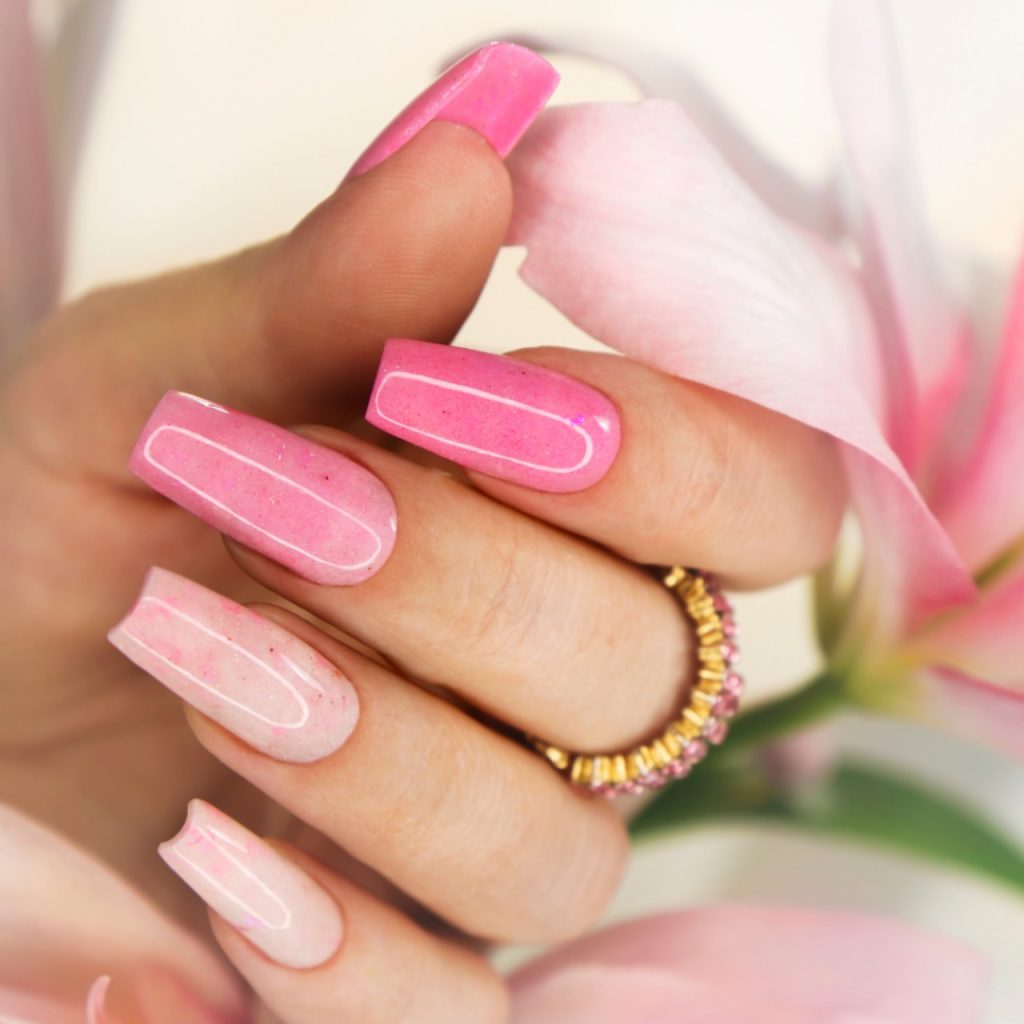
Summer Ombre Nails: Summer Ombre nail designs are all about embracing the vibrant and carefree spirit of the season. This design incorporates bright and playful colors, such as tropical hues or sun-kissed shades. Summer-themed Ombre nail designs bring a splash of color and fun to your fingertips, capturing the essence of summer vibes.
Ombre Acrylic Nails: Ombre acrylic nails take advantage of the durability and versatility of acrylic extensions or overlays. This type of Ombre design allows you to achieve stunning gradient effects using acrylic materials. Whether you prefer subtle gradients or bold color transitions, Ombre acrylic nails offer a long-lasting and eye-catching manicure.
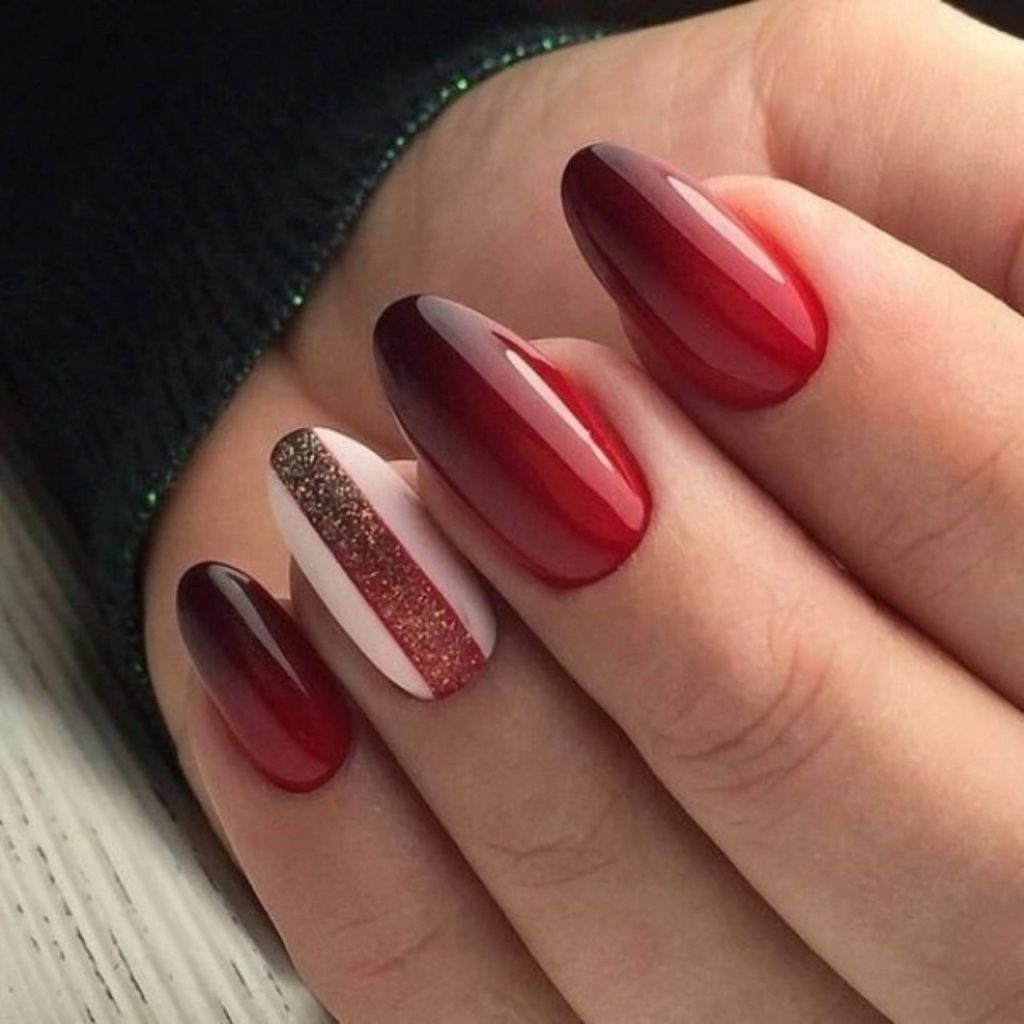
Fall Ombre Nails: Fall Ombre nails capture the warm and cozy vibes of autumn. This design incorporates rich earth tones, deep burgundy shades, or other autumn-inspired colors. Fall-themed Ombre nail designs reflect the changing colors of the season, bringing a touch of elegance and seasonal beauty to your manicure.
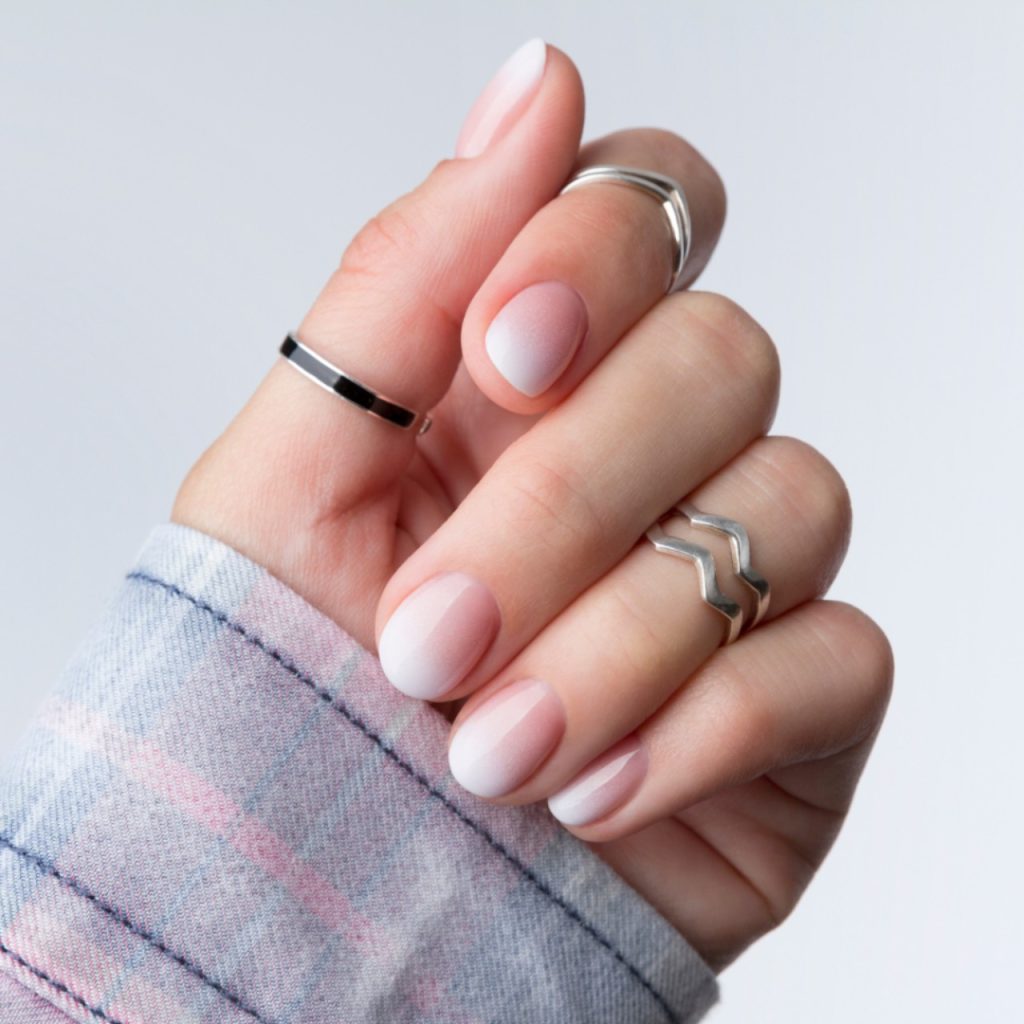
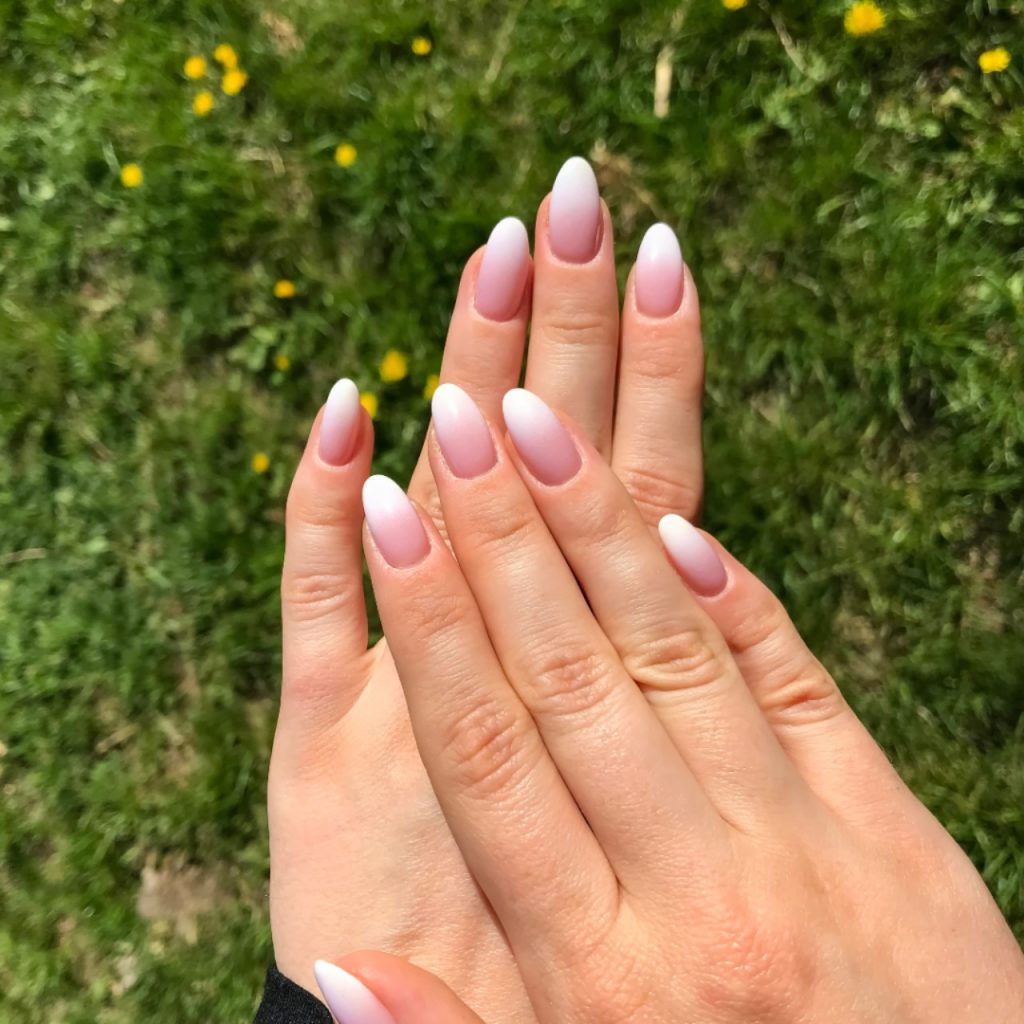
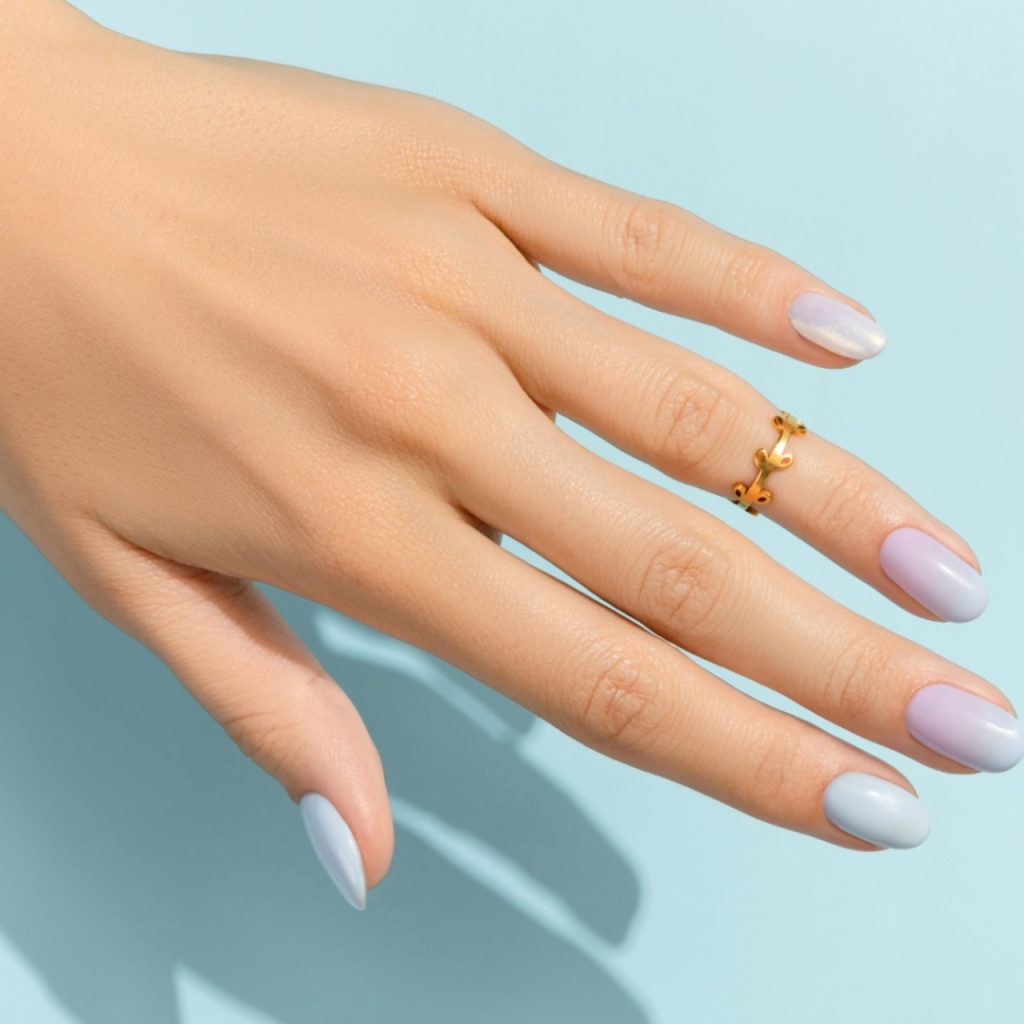
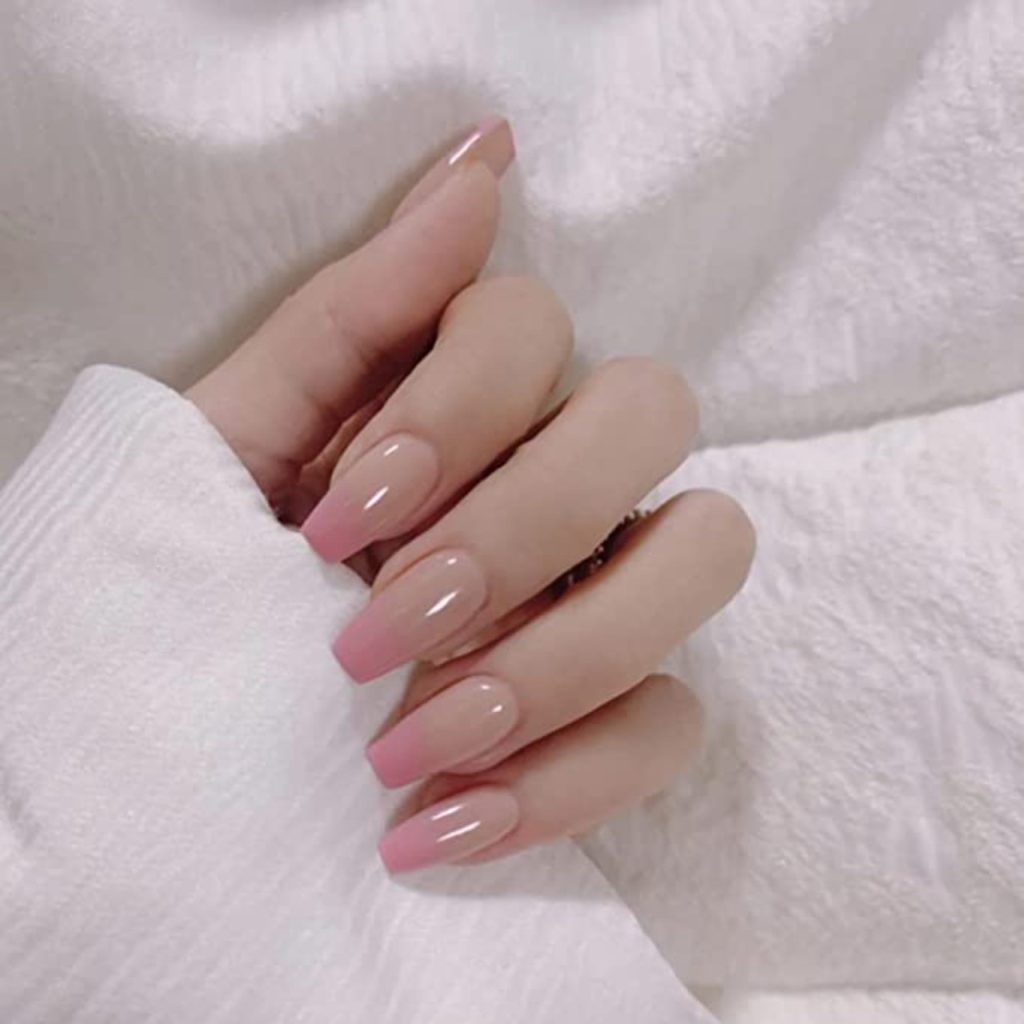
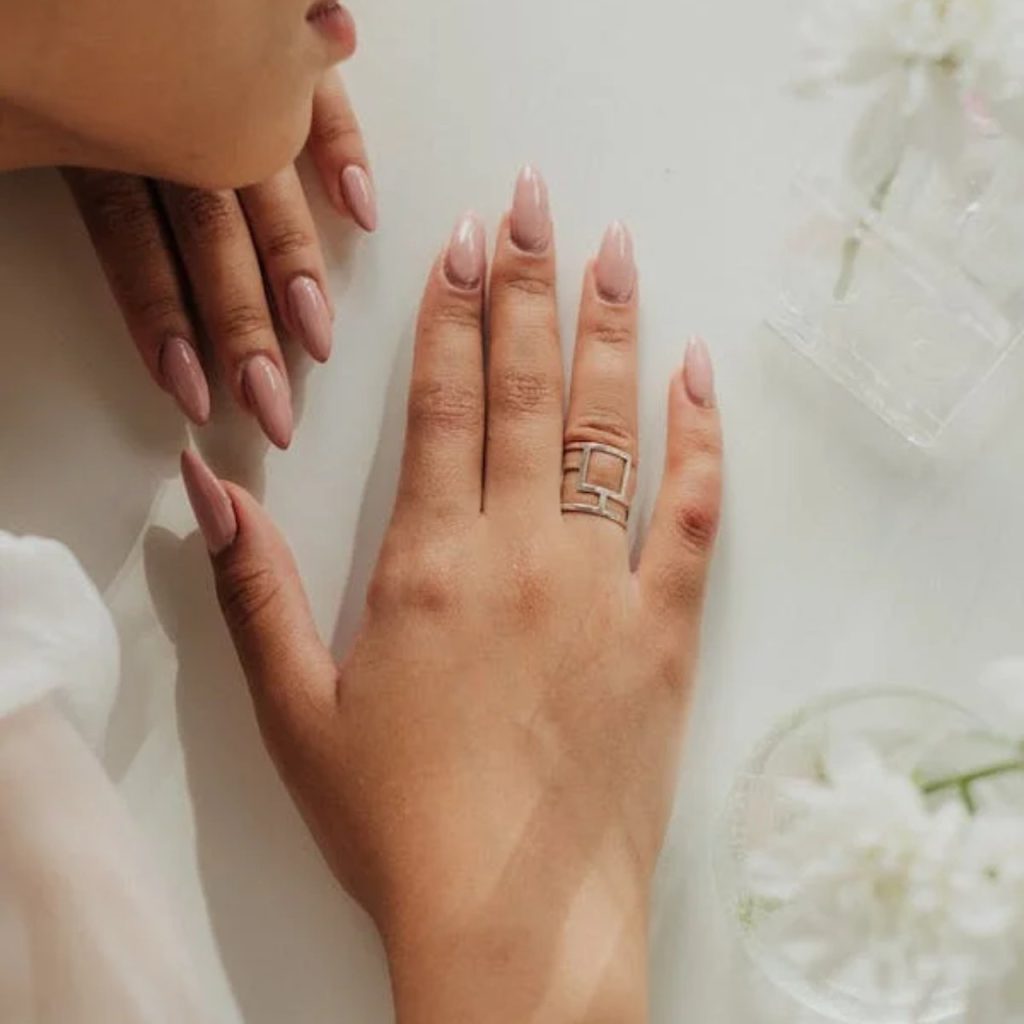
Nude Ombre Nails: Nude Ombre nail designs offer a versatile and understated manicure option. This design uses nude shades to create a natural-looking gradient effect. Nude Ombre nails are elegant, sophisticated, and go well with any outfit or occasion. They provide a timeless and classy manicure choice that exudes simplicity and beauty.
Coffin Ombre Nails: Coffin Ombre nails combine the trendy and edgy coffin nail shape with the gradient effect of Ombre. The sleek and tapered design of coffin-shaped nails beautifully showcases the transition of colors. Coffin Ombre nails give your manicure a fashionable and eye-catching look, accentuating the gradient effect with their unique shape.
Ombre Dip Nails: Ombre dip nails offer a quick and easy way to achieve flawless Ombre nails. This design utilizes the dip powder technique, which involves dipping the nails into colored powders to create the gradient effect. Ombre dip nails eliminate the need for complicated brush strokes, resulting in effortless and long-lasting Ombre designs.
Short Ombre Nails: Short Ombre nails prove that you don’t need long nails to rock Ombre designs. This type of Ombre design looks equally stunning on shorter nail lengths and adds a touch of style to your fingertips. Short Ombre nails offer a seamless and eye-catching gradient effect that enhances the beauty of your nails, regardless of their length.
French Ombre Nails with Glitter: French Ombre nail designs with glitter elevate the classic French Ombre nail designs with a glamorous twist. In this design, glitter is incorporated into the gradient effect, adding elegance and sparkle. French Ombre nails with glitter combine the sophistication of a French manicure with the dazzling effect of glitter, creating a chic and eye-catching nail design.
How to Achieve Different Types of Ombre Nail Designs
French Ombre Nails
What You’ll Need
- Base coat
- White nail polish
- Lighter shade of nail polish
- Sponge applicator
- Top coat
Step-by-Step Guide
- Apply a base coat to your nails.
- Apply white nail polish to the tips of your nails, creating the French manicure base.
- Once the white polish is dry, apply a lighter shade of nail polish on the sponge applicator.
- Gently press the sponge onto the nails, starting from the tips and blending upwards to create a soft gradient effect.
- Repeat the previous step until you achieve the desired Ombre effect.
- Finish with a top coat to seal and protect your design.
Glitter Ombre Nails
What You’ll Need
- Base coat
- Nail polish in your desired Ombre colors
- Glitter nail polish or loose glitter
- Sponge applicator
- Top coat
Step-by-Step Guide
- Apply a base coat to prepare your nails.
- Apply the first color of nail polish to your nails, covering about two-thirds of each nail.
- On the sponge applicator, apply the second color of nail polish and gently press it onto the area where the first color ends, creating a gradient effect.
- Repeat the previous step with the remaining colors, gradually moving towards the nail tips.
- While the polish is still wet, apply a layer of glitter nail polish or sprinkle loose glitter onto the sponge and press it onto the nails to add a touch of sparkle.
- Finish with a top coat to seal and protect the design.
Ombre French Nails
What You’ll Need
- Base coat
- Nude nail polish
- White nail polish
- Sponge applicator
- Top coat
Step-by-Step Guide
- Apply a base coat to prepare your nails.
- Apply the nude nail polish to your nails as a base color and let it dry completely.
- On the sponge applicator, apply the white nail polish and gently press it onto the tips of your nails.
- Gradually blend the white color upwards towards the nail bed, creating a seamless Ombre effect.
- Repeat the previous step until you achieve the desired gradient effect.
- Finish with a top coat to seal and protect the design.
Ombre Nail Designs for Summer
What You’ll Need
- Base coat
- Bright, summer-inspired nail polish colors
- Sponge applicator
- Top coat
Step-by-Step Guide
- Apply a base coat to prepare your nails.
- Select two or more bright, summer-inspired nail polish colors.
- On the sponge applicator, apply the first color and gently press it onto the nails, starting from the tips and moving towards the nail bed.
- Repeat the previous step with the remaining colors, creating a gradient effect from vibrant to lighter shades.
- If necessary, go back and touch up any areas to enhance the gradient effect.
- Finish with a top coat to seal and protect the design.
Ombre Acrylic Nails
What You’ll Need
- Acrylic nails or extensions
- Acrylic powders in your desired Ombre colors
- Monomer liquid
- Nail brush
- Nail file
- Top coat
Step-by-Step Guide
- Prepare your nails by applying primer and applying acrylic nails or extensions.
- Choose your desired Ombre colors and pour a small amount of each acrylic powder into separate containers.
- Dip your nail brush into the monomer liquid and then dip it into the first color of acrylic powder.
- Apply the acrylic mixture to the nail, starting from the tip and blending it towards the nail bed.
- Repeat the previous step with the remaining colors, blending them together to create a smooth Ombre effect.
- Once the acrylic has hardened, file and shape your nails.
- Finish with a top coat to seal and protect the design.
Fall Ombre Nail Designs
What You’ll Need
- Base coat
- Fall-themed nail polish colors
- Sponge applicator
- Top coat
Step-by-Step Guide
- Apply a base coat to prepare your nails.
- Select fall-themed nail polish colors, such as earth tones or deep burgundy shades.
- On the sponge applicator, apply the first color and gently press it onto the nails, starting from the tips and moving towards the nail bed.
- Repeat the previous step with the remaining colors, creating a gradient effect that captures the essence of fall.
- If necessary, go back and touch up any areas to enhance the gradient effect.
- Finish with a top coat to seal and protect the design.
Nude Ombre Nail Designs
What You’ll Need
- Base coat
- Nude nail polish shades in different hues
- Sponge applicator
- Top coat
Step-by-Step Guide
- Apply a base coat to prepare your nails.
- Select nude nail polish shades in different hues, ranging from light to dark.
- On the sponge applicator, apply the lightest shade and gently press it onto the nails.
- Gradually blend the darker shades upwards towards the nail bed, creating a seamless gradient effect.
- Repeat the previous step until you achieve the desired Ombre effect.
- Finish with a top coat to seal and protect the design.
Coffin Ombre Nails
What You’ll Need
- Base coat
- Two or more nail polish colors
- Sponge applicator
- Top coat
Step-by-Step Guide
- Apply a base coat to prepare your nails.
- Select two or more nail polish colors for your Ombre nail designs.
- On the sponge applicator, apply the first color and gently press it onto the nails, starting from the tips and moving towards the nail bed.
- Repeat the previous step with the remaining colors, creating a gradient effect that complements the coffin nail shape.
- If necessary, go back and touch up any areas to enhance the gradient effect.
- Finish with a top coat to seal and protect the design.
Ombre Dip Nails
What You’ll Need
- Base coat
- Dip powder in your desired Ombre colors
- Activator
- Brush
- Top coat
Step-by-Step Guide
- Apply a base coat to prepare your nails.
- Choose your desired Ombre nail designs colors and pour a small amount of each dip powder into separate containers.
- Apply a base coat on the nails and dip them into the first color of dip powder.
- Tap off any excess powder and apply the activator to set the powder.
- Repeat the previous steps with the remaining colors, gradually moving towards the nail tips.
- Once all the colors are applied, use a brush to remove any excess powder.
- Finish with a top coat to seal and protect the design.
Short Ombre Nails
What You’ll Need
- Base coat
- Two or more nail polish colors
- Sponge applicator
- Top coat
Step-by-Step Guide
- Apply a base coat to prepare your nails.
- Select two or more nail polish colors for your Ombre nail designs.
- On the sponge applicator, apply the first color and gently press it onto the nails, starting from the base and moving towards the tips.
- Repeat the previous step with the remaining colors, creating a gradient effect that complements short nail lengths.
- If necessary, go back and touch up any areas to enhance the gradient effect.
- Finish with a top coat to seal and protect the design.
French Ombre Nails with Glitter

What You’ll Need
- Base coat
- White nail polish
- Nude nail polish
- Glitter nail polish or loose glitter
- Sponge applicator
- Top coat
Step-by-Step Guide
- Apply a base coat to prepare your nails.
- Apply the white nail polish to the tips of your nails, creating the French manicure base.
- Once the white polish is dry, apply the nude nail polish on the sponge applicator and gently press it onto the area where the white color ends.
- Gradually blend the nude color upwards towards the nail bed, creating a seamless Ombre effect.
- While the polish is still wet, apply a layer of glitter nail polish or sprinkle loose glitter onto the sponge and press it onto the nails to add a touch of sparkle.
- If necessary, go back and touch up any areas to enhance the gradient effect.
- Finish with a top coat to seal and protect the design.
Ombre Nail Design at Home: Step-By-Step Guide
Achieving Ombre nail designs at home is easier than you think. Here’s a step-by-step guide to help you achieve the perfect Ombre nails:
Step 1: Gather Your Supplies
To achieve Ombre nail designs, you will need a few essential supplies:
- Base coat
- Two or more nail polish colors
- Makeup sponge
- Top coat
- Nail polish remover
- Cotton swabs
- Nail polish remover pen (optional)
Step 2: Prep Your Nails
First things first, clean your nails. Trim and shape your nails to your desired length and apply a base coat to protect your nails from staining.
Step 3: Choose Your Colors
Choose two or more nail polish colors that you want to use for your Ombre nail designs. You can choose colors from the same color family or go for contrasting colors for a bold look.
Step 4: Paint Your Nails
Start by painting your nails with the lighter color as the base. Let it dry and move to the next step.
Step 5: Prepare the Sponge
Take a makeup sponge and cut it into small pieces. The sponge will help you achieve the gradient effect on your nails.
Step 6: Apply the Nail Polish on the Sponge
Apply a few drops of the darker nail polish on the sponge and dab it on a piece of paper to remove any excess polish.
Step 7: Dab the Sponge on Your Nails
Gently dab the sponge on your nails, starting from the tip and moving towards the base. You may need to repeat this step a few times to achieve the desired intensity of color.
Step 8: Clean Up
Use a cotton swab dipped in nail polish remover to clean up any excess polish around your nails. You can also use a nail polish remover pen for more precise clean up.
Step 9: Apply Top Coat
Once your Ombre design is dry, apply a top coat to seal in the colors and give your nails a glossy finish.
Useful Tips for Perfect Ombre Nail Designs
- Use colors from the same color family for a more subtle look.
- Experiment with different textures, such as glitter or metallic, for a unique Ombre nail designs.
- Use a light hand when dabbing the sponge on your nails to avoid smudging the colors.
- Have fun and get creative with your Ombre nail designs!
Final Thoughts
Ombre nail designs are a fun and easy way to add some color and personality to your nails. With the right supplies and a little practice, you can achieve the perfect Ombre nail designs at home. So go ahead and try out this popular nail art trend and show off your unique Ombre nail designs to the world!