
Welcome to an in-depth guide on creating a trendy and elegant Chrome French nail set. If you’re looking for a manicure that combines the timeless charm of French tips with the modern flair of chrome, you’re in the right place. Let’s walk through each step to help you achieve this stunning look at home.
Preparing the Nails
To begin, select your nail tips carefully. For this look, I opted for Eno Couture’s long square nail tips. These tips are a favorite because they flatter all nail shapes and provide the ideal length and structure for this design. After applying the tips, it’s essential to buff them. Buffing smooths the surface and ensures that the polish adheres better. Once you’ve finished buffing, thoroughly dust off any residue to keep the nails clean and ready for the next step. This sets the stage for a perfect Chrome French nail.
Applying the Base Coat
A good base coat is the foundation of any great manicure. While you can choose any base coat you prefer, my personal favorite is Beetle’s Base Coat. This product is affordable, effective, and readily available on Amazon. It’s the base coat I use for all my nail sets because it provides a smooth surface for applying polish and helps extend the life of your manicure. After applying the base coat, cure it under your nail lamp to set it.
Adding the Nude Base Color
Now that the base coat is set, it’s time to add the nude base color. For this design, I used Alysa’s Nude Pink (GB60), a shade that’s available on Amazon and has quickly become one of my go-to colors. This particular nude is more neutral than pink, making it a versatile choice that complements the chrome tips beautifully. Apply a thin, even layer of this color to all your nails, then cure it under the lamp. Once cured, apply a second coat to ensure full coverage and a rich, even tone. This is an important step in achieving a beautiful Chrome French nail look.
Accentuating with White and Chrome

Now it’s time to add a bit of contrast with a white accent nail. I chose to paint the entire middle finger white using Melody Susie’s white gel polish. This step helps to highlight the chrome effect that will be added later. Once the white polish is applied, cure the nail under the lamp.
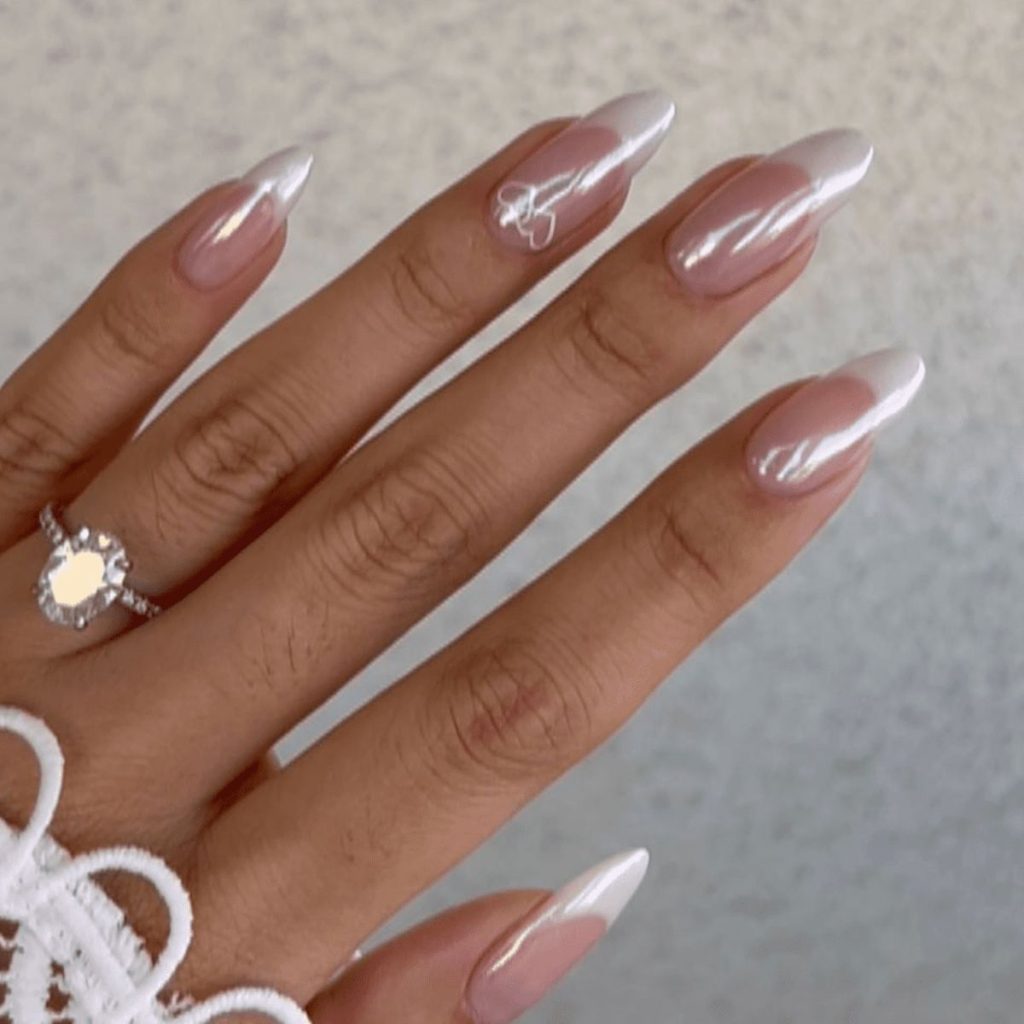
Next, it’s time to apply the chrome powder. I used a classic white chrome with a silver sheen that doesn’t have any iridescent undertones—perfect for a clean, sophisticated look. You can apply the chrome powder using a sponge applicator or even your finger, ensuring it adheres smoothly and evenly to the nail. This chrome powder can be found in many stores, but I usually purchase mine from Amazon. It’s essential for creating the perfect Chrome French nail.
Creating the Chrome French Tips

With the base color and accent nail complete, it’s time to work on the French tips. This step calls for a bit of patience and careful attention to detail. Start by gently buffing the nude nails to remove any shine. Buffing is crucial because it ensures that the chrome powder only sticks to the white tips and not the nude areas. This results in a flawless Chrome French nail.
Once the nails are prepped, apply the white gel polish to the tips using a fine, precision brush. The brush I used for this step is actually a custom tool that I’ve been developing specifically for creating flawless French tips. It’s thin and precise, allowing for clean, crisp lines every time. I’ve been working on this brush for months, tweaking the bristle thickness to achieve perfection. Keep an eye out for its release in early September!
After painting the French tips, apply the chrome powder to the white areas, being careful to avoid the nude sections. Brush away any excess powder that may have strayed onto the nude areas, and then cure the nails under the lamp to set the design.
Adding 3D Floral Accents
To elevate the look further, consider adding 3D flowers to your nails. This step adds texture and a touch of elegance, making your manicure truly unique. I used a thick, sticky gel known as Flubber Gel to create the flowers. Start by placing small dots of the gel on the nail where you want the petals to be. Then, using a pointed round brush, flatten the dots into petal shapes, effectively integrating Chrome French nail aesthetics with 3D design.
Working with Flubber Gel can be tricky because of its sticky, thick consistency, but with a bit of practice, you’ll get the hang of it. I found that using a dotting tool to pick up the gel works best, as it helps control the amount of product you apply. Remember, a little goes a long way—using too much gel can result in oversized petals that are difficult to manage.
Once the petals are shaped, you can add a bit of color for dimension. I used Nail Reserve’s Floating Pink gel polish to add a subtle pink hue to the petals. This step was inspired by a reference photo my client sent me, which featured similar flowers with pink centers. After applying the pink gel, cure the flowers under the lamp. These small touches compound to create a stunning Chrome French nail set.
Final Touches and Top Coat
The final step is applying the top coat. This not only seals in your design but also gives your nails a beautiful, glossy finish. I recommend Beetles No Wipe Top Coat for this step, as it provides a long-lasting shine without the need for additional wiping. When applying the top coat over the 3D flowers, use a thin layer to avoid losing the texture and definition of the petals. This step completes the Chrome French nail design.
Final Wording on Chrome French Nail
And there you have it—a complete guide to creating a stunning Chrome French nail set with 3D floral accents. This look is perfect for anyone who wants a manicure that’s both classic and contemporary, making it ideal for any occasion. The combination of the nude base, white French tips, and chrome accents creates a sophisticated yet eye-catching design that’s sure to turn heads.