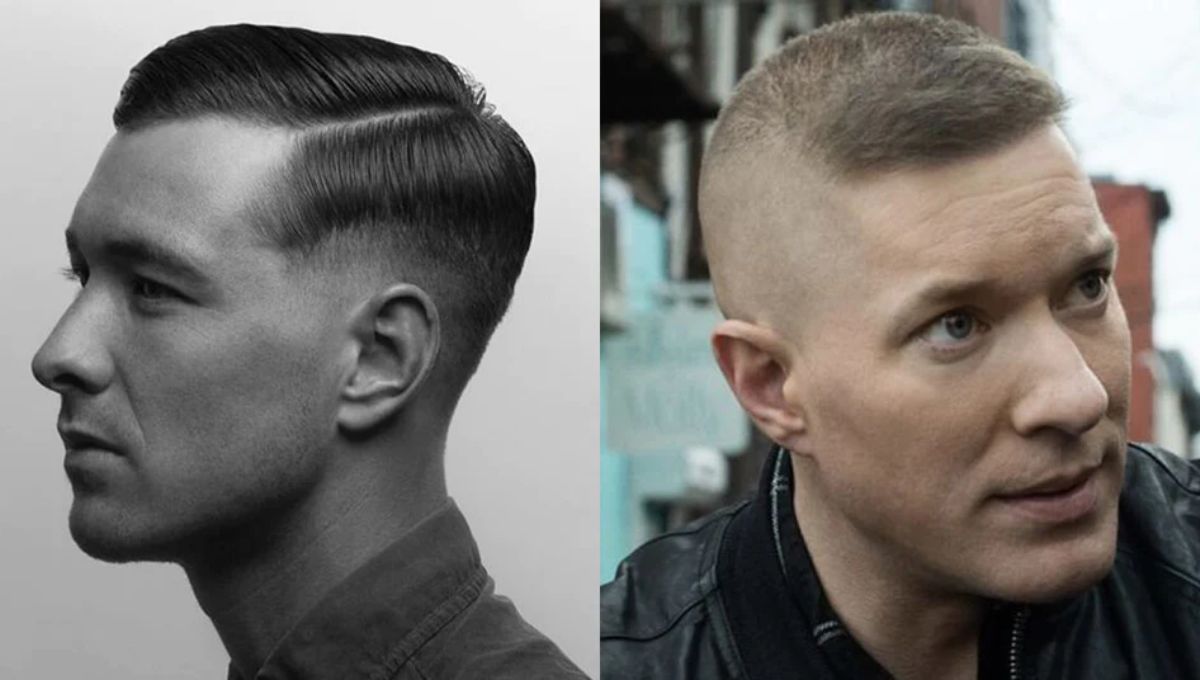


Creating the perfect blowout mid taper can elevate your grooming game, giving you a clean and stylish look that’s both modern and versatile. This step-by-step guide will walk you through the entire process, ensuring you achieve the best results every time.
Preparing the Hair
Begin by moistening the entire head of hair. Moistening helps in easier sectioning and blending, which is crucial for achieving a flawless blowout mid taper. Next, section the hair into two equal parts along the parietal ridge. This is done to ensure the top portion of the hair remains separate from the sides, making it easier to work on the fade without interfering with the longer hair on top.
Starting the Base for Blowout Mid Taper
Using your preferred trimmer, start by creating a rounded baseline. Focus on using the corners of your trimmer to achieve a smooth, curved line. Once the baseline is established, remove all the hair below it. Be gentle to avoid pressing too hard on the scalp, and leave some bulk around the C cup area for a natural look in your blowout mid taper.
Afterward, clean up the remaining stubble using a shaver. This step ensures that the area below the baseline is completely smooth and ready for the next steps.
Establishing the First Guideline
With your clipper lever open, create a half-inch guideline above the baseline. Remember, using the corners of the clipper in tight spaces is crucial for shaping the blend properly. Ensure that this guideline shadows the baseline perfectly for a seamless transition in your blowout mid taper.
Once the guideline is set, close the lever halfway and start blending within this area. Work slowly and steadily to ensure a smooth gradient.
Blending the Fade
If the baseline is still visible after the initial blending, use your trimmer flat against the scalp to erase it. Next, attach the half guard with the lever open and create another half-inch guideline above the previous one. Repeat the process with a one guard open, moving up another half inch. As you progress, attach the one-and-a-half guard, open the lever, and continue moving up half an inch for that perfect blowout mid taper.
This technique is known as fading up. It’s essential not to remove any bulk from the top at the start of the haircut, allowing for a smooth transition from the fade into the longer hair.
Final Blending and Detailing
Now, with the number two guard open, use the corners of your clipper to move up another half inch, blending the transition from the fade into the bulkier hair above. To refine the blend, use the clipper-over-comb technique to remove excess bulk without disrupting the taper. This ensures a professional-looking blowout mid taper.
Finally, with no guard and the lever open, eliminate any remaining visible lines. Detailing is key in this stage, so take your time. Blending shears can be useful here to remove minimal bulk in darker areas, ensuring a smooth and even fade.
Detailing the Taper
Pay close attention to the details, as they will set your work apart from others. Don’t rush; if the blend needs further refinement, continue working on it until you’re satisfied with the results. A great blowout mid taper maintains symmetry on both sides of the head.
Rear Taper and Finishing Touches
For the rear taper, comb the hair down into its natural position. Start by setting your baseline carefully, particularly around the neck area. Use your trimmer cautiously to avoid irritation. Clean up the stubble with a shaver, and then, with the lever open and no guard, create the initial half-inch guideline. Follow the same fading process as with the sides, gradually blending the hair upwards for that ideal blowout mid taper.
After achieving the desired fade, use a number two guards open to remove any bulk and soften the transition. Finish off by refining the blend with your clipper-over-comb technique.
Styling the Blowout
Once the taper is complete, focus on the top. Slightly trim the hair along the parietal ridge to ensure the blowout pops. Use your fingers as a guide to maintain a natural, tapered look. The styling is essential for the final blowout mid taper.
Apply a clay of your choice to style the hair. Work the product thoroughly through the hair to maximize hold and texture. The goal is to maintain volume while ensuring the sides transition smoothly into the top.
Perfecting the Hairline
For the final touch, clean up the hairline. Pay special attention to the C cups, as they play a crucial role in defining the overall shape of the haircut. Take care not to angle in too sharply; instead, maintain a natural, rounded line that complements the taper. This polish gives the perfect finish to your blowout mid taper.
Conclusion
With these steps, you’ll achieve a stunning blowout mid taper that stands out for its clean lines and smooth transitions. Remember, patience and attention to detail are essential, especially when working on the taper and blending. Practice makes perfect, and over time, your skills will improve with each haircut. Whether you’re a seasoned professional or just starting, mastering this technique will undoubtedly enhance your repertoire.