
Voluminous eyelashes are a dream come true! But applying fake or strip eyelashes is indeed a super-difficult task. And, doing it alone? Definitely A BIG NO!
That’s probably why you’re frequently visiting salons and spending bucks just to get that picture-perfect look. But now, it’s time for a cheer because we have got you fool-proof, and EASIEST steps to applying strip eyelashes AT HOME.
The expensive salon appointments are now over! With the steps given below, you can easily apply strip lashes even if it’s your first time.
In this blog, we’ve shared how the makeup guru Laura Lee applies strip eyelashes without any beautician’s help. Copying her exact steps will help you apply them with much less frustration.
Ready? Let’s get into this…

Meet the Experts
Laura Lee is a renowned makeup artist and entrepreneur. She is the CEO of a fashion brand MinimLA and a Cosmetic Brand Laura Lee, Los Angeles.
Step 1: Curl Your Lashes
Start with preparing your lashing. Remember, the better the foundation, the better the results!
So, first, clean your eyelashes with a thin brush and remove all the dirt (if any) or makeup from it. When you’re done with that, grab an eyelash curler to lift and shape your eyelashes. For awesome results, we’d recommend warming up the curler with a hairdryer for just a few seconds. Make sure the curler isn’t too hot before applying it to avoid injury.
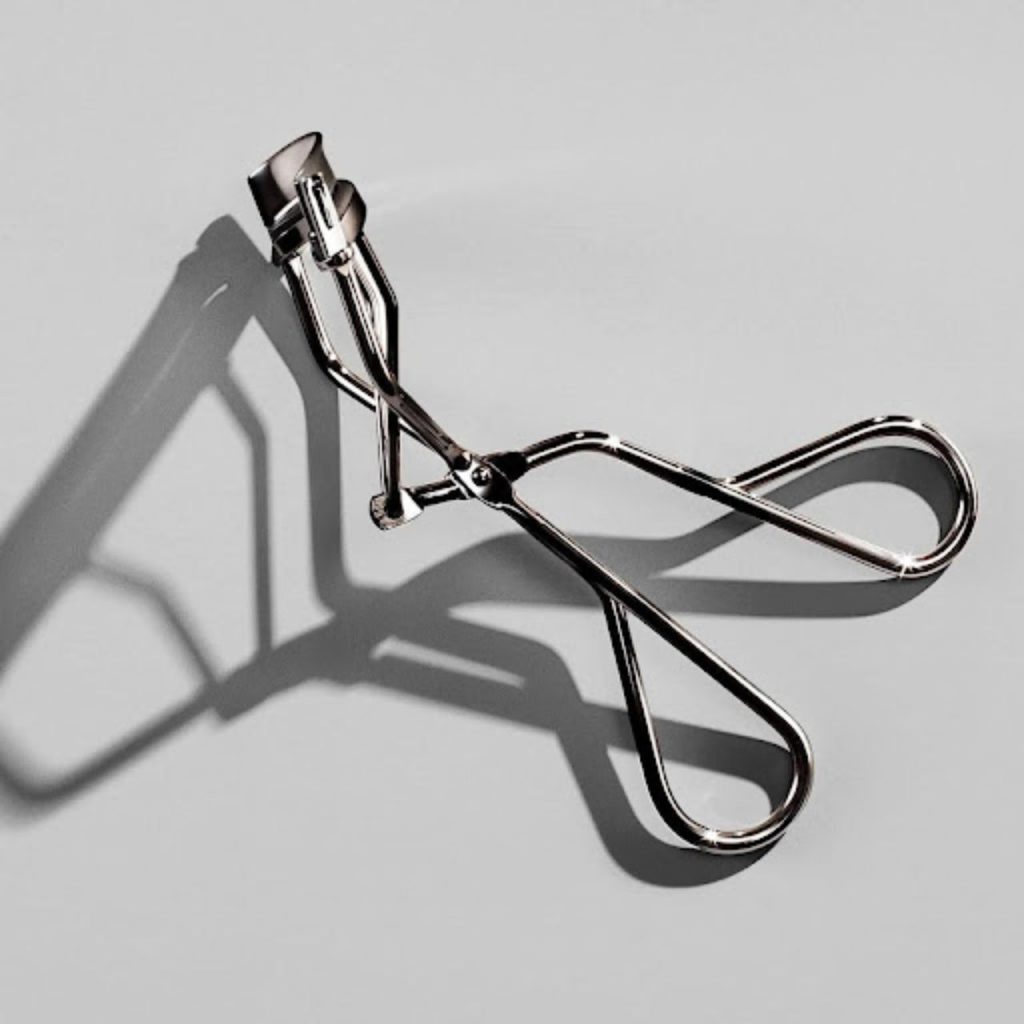
Place the curler close to the eyelash line but right on top of it. This will prevent pinching and damage to your eyes, helping the eyelashes curl more naturally. Along with all this, make sure not to hold the curler for more than 20 seconds at one go. Plus, don’t apply too much pressure on it.
All done? Let’s see what’s next…
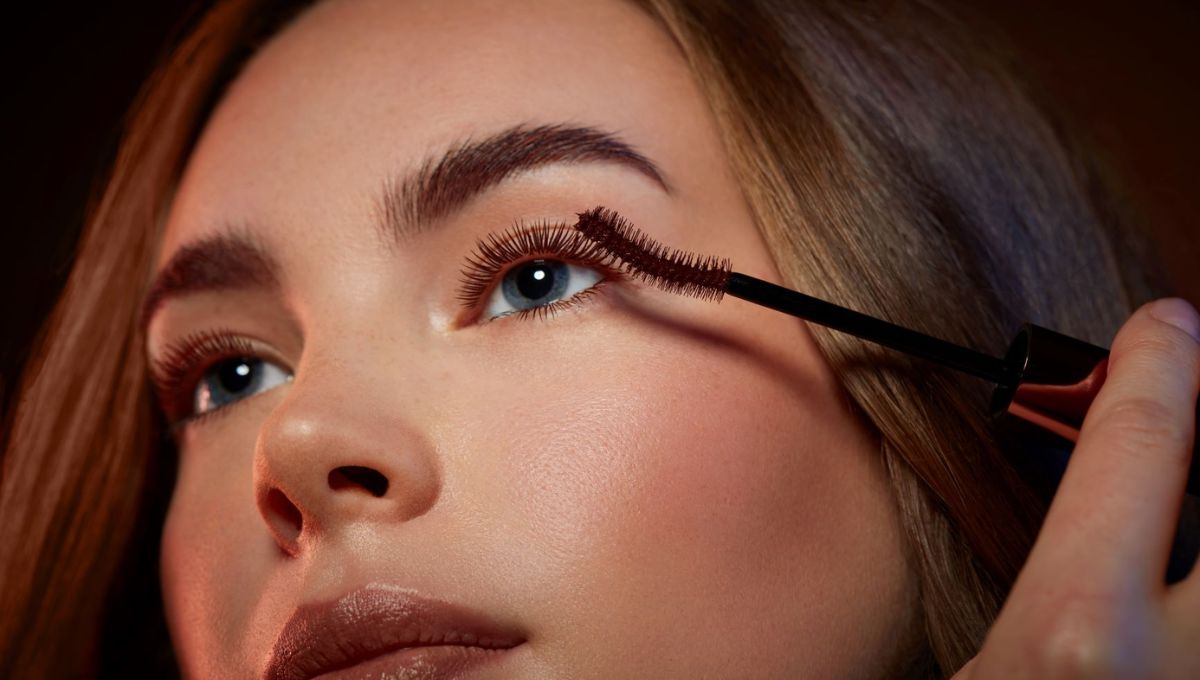
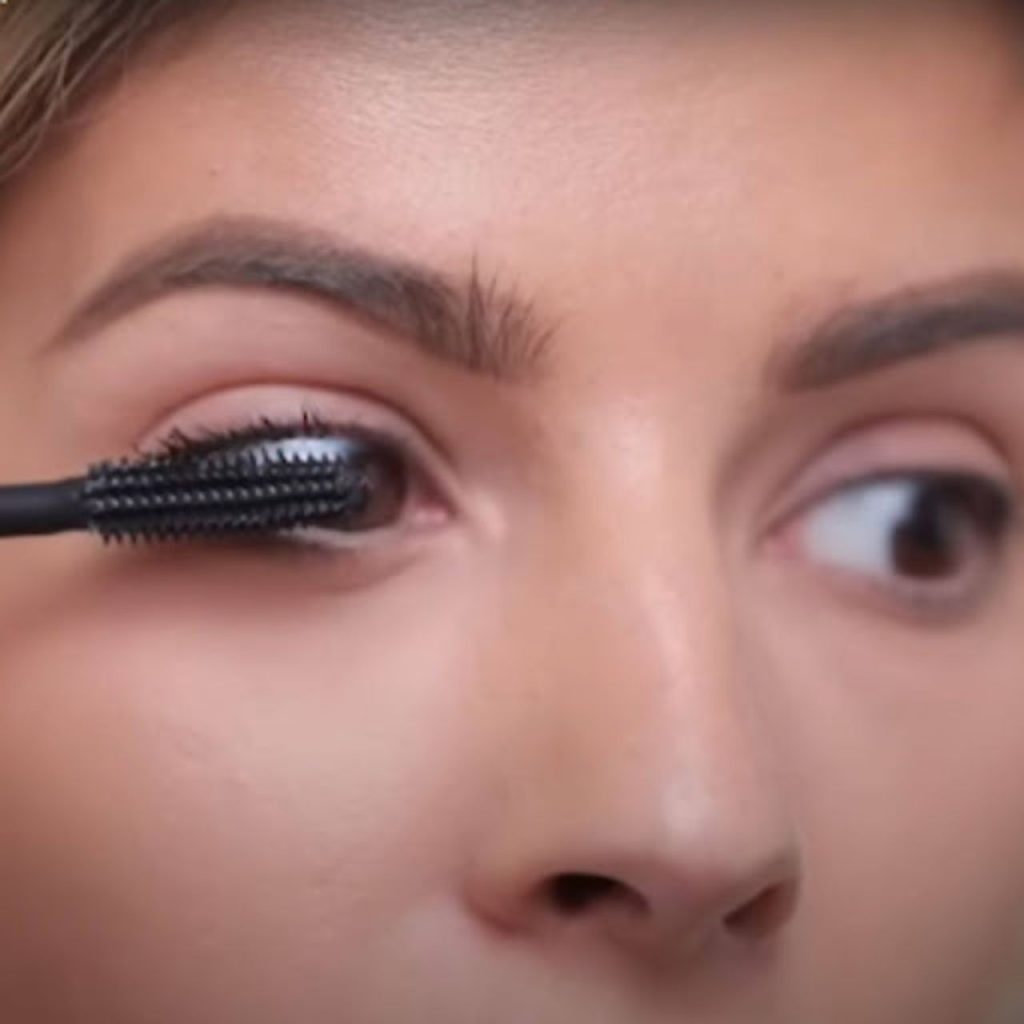
Step 2: Apply Mascara Beforehand
Now it’s time to add texture to your base foundation. Get a nice mascara and gently apply it to your curled eyelashes. This step is important because the texture on your original eyelashes will allow better adherence, resulting in a fuller effect.
Start applying the mascara from the base of your eyelashes and gently wiggle it as you move upwards to the tips. This way, your mascara will coat each and every lash from its root. Secret tip? You can also use the zigzag technique to prevent the eyelashes from sticking together.
Let the mascara dry off. When done, you’re ready to move on to the next step!

Step 3: Choose the Additional Supplies
Selecting the right tools is important for a successful eyelash application. Fashionistas often rely on just the strip eyelashes and don’t get additional supplies. That’s one of the biggest mistakes.
Remember, makeup is an art and every artist needs the right tools!
Hence, equip yourself with high-quality tools that will help you apply the lashes. Here are the tools that you need to get:
- Tweezer: To hold the delicate lashes and to ensure perfect placement.
- Eyelash Adhesive: For a long-lasting hold.
Get these supplies to streamline the entire application process, making sure that your eyelashes stick for hours.
Step 4: Trim Strip Eyelashes If Necessary
Perfection will arrive with perfect-sized strip lashes!
Strip lashes arrive in standard sizes. And, it’s important to identify whether the lash is longer for a flawless finish. Here are the signs that can help anyone identify whether the lash is longer or not:
- You can clearly see the lash band extending beyond the outer edge of your lash.
- You can feel the edges of the lashes pinching in your eyes.
- Your eye is tearing up due to the pocking of edges.
If you find any of these signs, you need to trim it off.
Measure the strip lashes with your original lash line and cut the extra strands from the outer end just as shown in the image below.
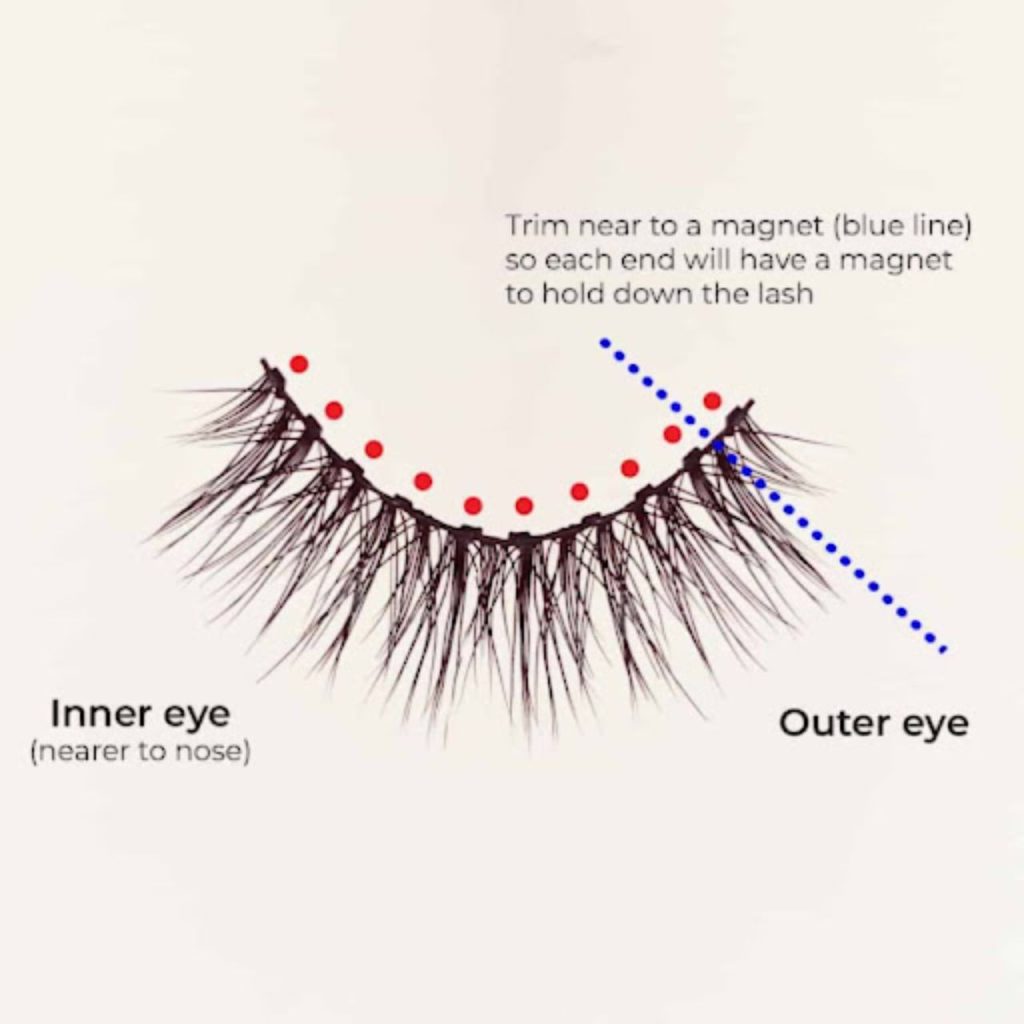
This step ensures a perfect fit, preventing any sort of discomfort.
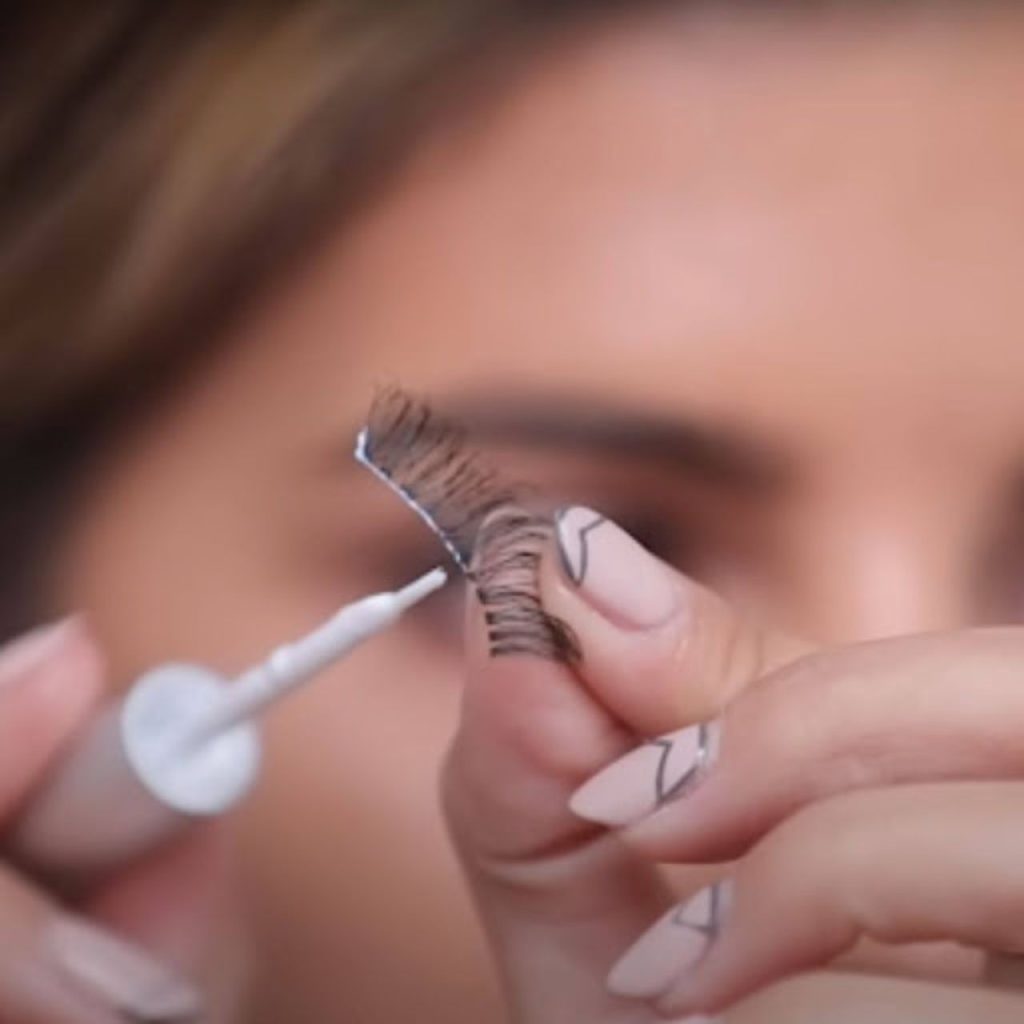
Step 5: Apply the Adhesive On the Strip Eyelashes
Beauticians usually don’t apply high-quality glue on the baseline of their strip eyelashes. And try to apply them with the built-in glue. Ah! That is never going to work. You need to get a quality adhesive to ensure a secure and strong bond between your lashes and the strip eyelashes.
Wondering how to apply the lashes carefully?
Apply a very thin layer of glue on the base of the strip eyelashes. Make sure the glue is tacky before heading to the next step!
If it’s your first time, you might want to buy a few cheap strip eyelashes to practice the application of glue. After all, practice makes a man perfect!
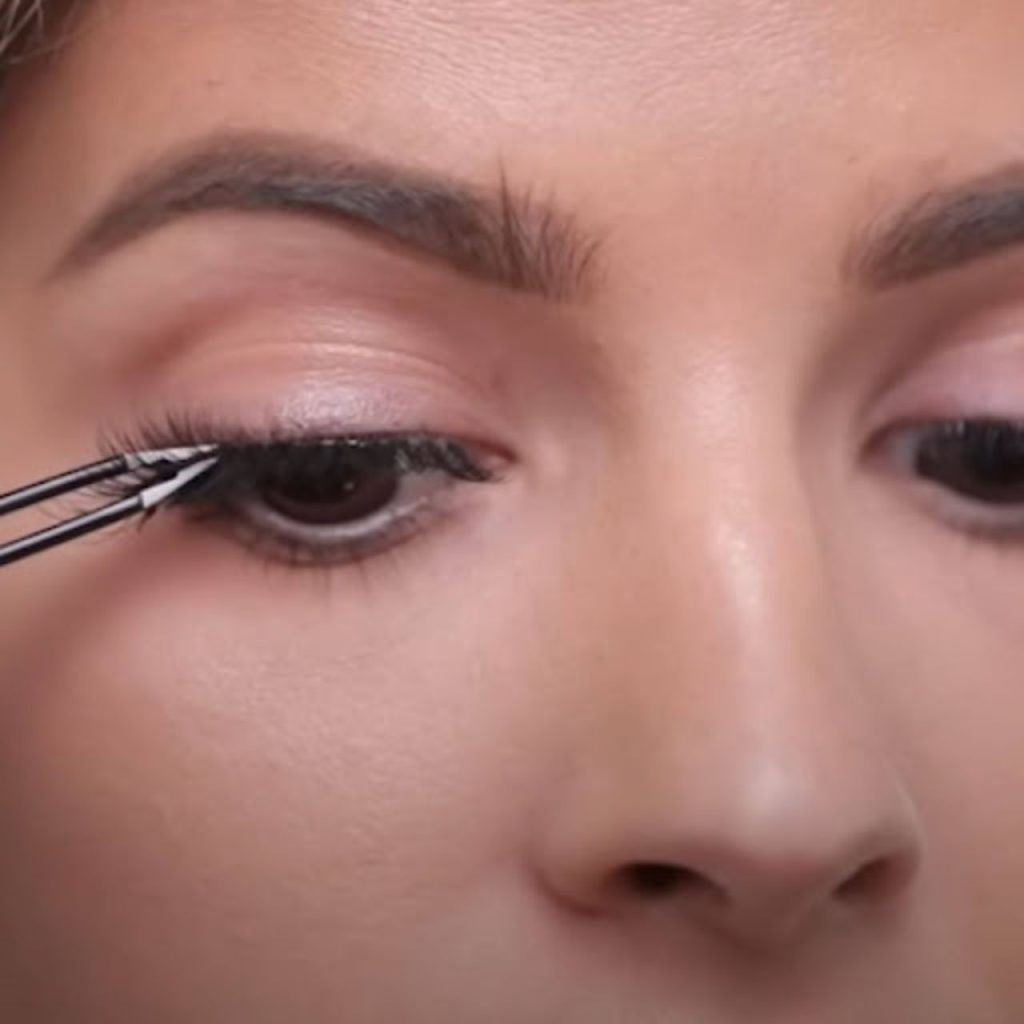
Step 6: Apply the Lashes
Now, comes the most important step! Take a deep breath as this step will make or break your entire look! With the glue in place, carefully put the strip lashes on your natural lash line using a tweezer.
Make sure to hold the tweezer in a way that the tips face upwards. First, press the lash gently in the center and then gradually move the inner and outer corners. Secure the corners with the tweezer. Lastly, don’t forget to ensure that the strip lashes sit close to your line.
Don’t hurry, take your time for a smooth finish.

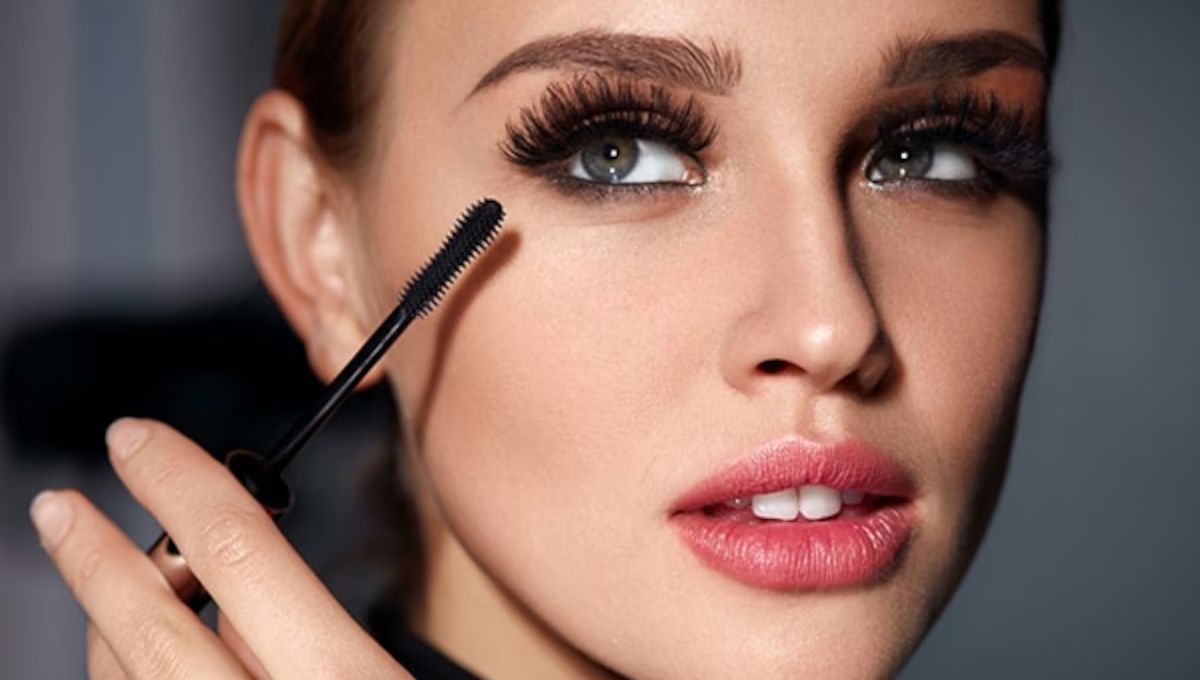
Step 7: Add Mascara
Finally, finish off with mascara.
Enhance the overall look of your lashes with mascara. Gently apply the mascara on your lashes to fuse the natural and strip lashes together. This step is going to give your lashes a glamorous finish, adding more volume to your lashes.
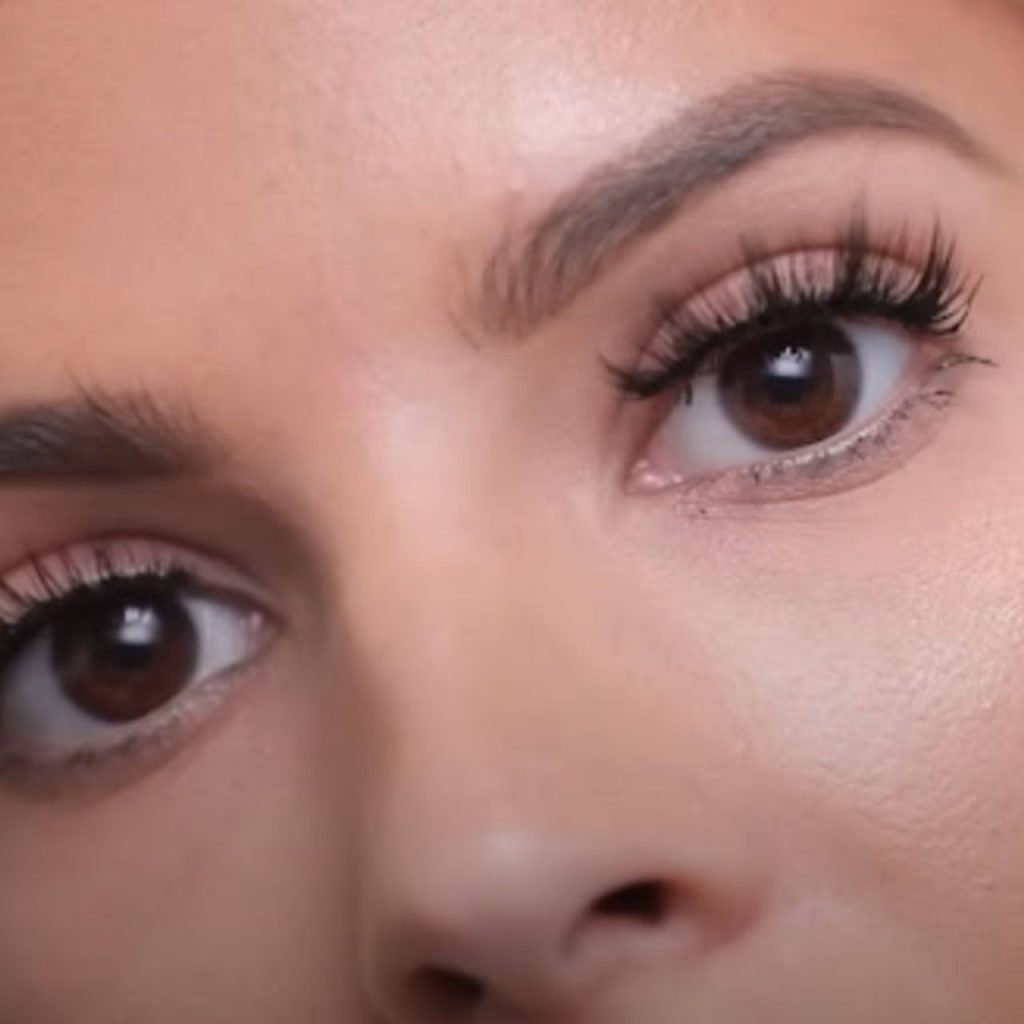
Final Look!
Look at the marvelous finish and volume Laura Lee has achieved with these steps. The elegant finishing, blended with a touch of elegance, not only improves but elevates the entire volume to a whole new level! The careful application of steps results in a breathtaking finish that’s a true example of a magnificent look!
Wrapping Up!
Even if you’re a beginner… or even if you’re an old makeup artist. With these steps, you can easily apply the strip, Russian eyelashes, or curl eyelashes. So, grab your favorite tool and get started.